
If you are using an iPhone 11, 12, 13, 14, or the latest iPhone 15, you may sometimes encounter the frustrating “SIM Not Supported” error. When this happens, your device cannot make calls, send texts, or access mobile data. This problem often appears during activation or after inserting a new SIM card, leaving users stuck with a locked device.
The good news is that there are multiple ways to fix this issue. In this article, we will explain the common reasons why your iPhone says SIM card not supported and provide 10 effective solutions. Among them, the first 7 methods have a higher success rate, while the last 3 serve as backup options.
Part 1. Why iPhone Says SIM Card Not Supported?
When your iPhone shows “SIM Not Supported”, the cause could be related to network restrictions, software issues, or even hardware problems. Below are the most common reasons:
1. Carrier Lock (Network Restrictions)
Many iPhones are sold locked to a specific carrier. If you insert a SIM card from a different network, your iPhone will reject it and show the SIM not supported error.
2. SIM Card Not Inserted Correctly
A misaligned or loosely inserted SIM card can cause activation failure. Even dust or scratches on the SIM card surface may lead to your iPhone not recognizing it.
3. Outdated iOS or Software Glitches
Running an outdated iOS version sometimes leads to compatibility issues, making your iPhone say the SIM card is not supported. Minor software bugs during updates can also trigger the error.
4. eSIM Activation Issues
For iPhone models that support eSIM (iPhone XS and later, including iPhone 11/12/13/14/15/16/17), activation problems with the digital SIM can cause the same unsupported SIM message.
5. IMEI Block or Blacklist Problems
If your iPhone’s IMEI has been blacklisted due to theft reports or unpaid bills, any SIM card you insert may show as unsupported.
6. Physical or Hardware Damage
A faulty SIM tray, damaged motherboard, or other hardware issues can also result in the SIM not supported message on iPhone
Part 2. How to Fix SIM Not Supported on iPhone (7 Proven Solutions)
Below are 7 effective ways to fix the “iPhone SIM not supported” error on iPhone 11, 12, 13, 14, and the latest iPhone 15. These solutions have a higher success rate and are recommended to try first.
Solution 1. Remove SIM Lock with Passixer iPhone Unlocker
If your iPhone says SIM card not supported, the most reliable fix is to remove the carrier lock. With Passixer iPhone Unlocker, you can bypass SIM lock on iPhone in just a few clicks.
Works on all models, including iPhone X SIM not supported issues.
Steps to remove SIM restriction:
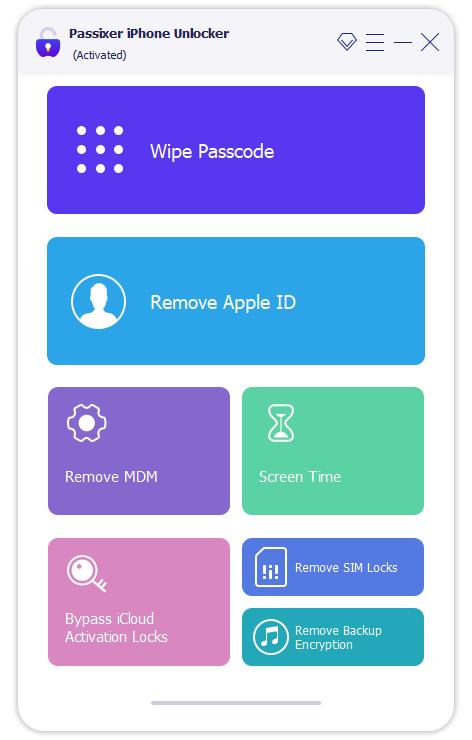
Open Passixer iPhone Unlocker on your computer. From the main interface, choose Remove SIM Lock to start the unlocking process.
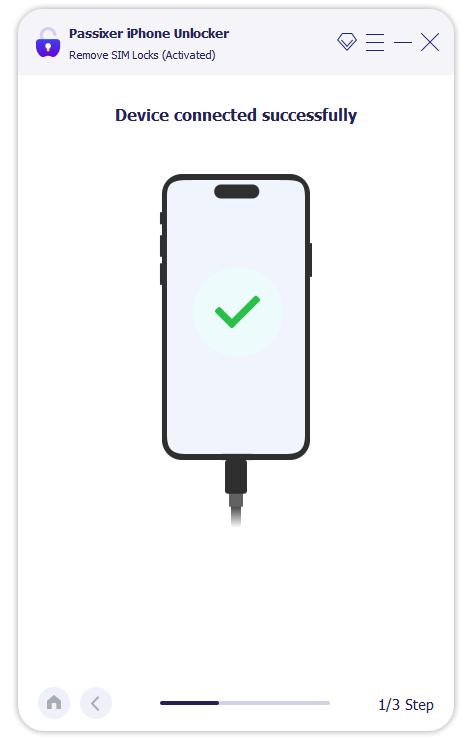
Use a workable USB cable to connect your iPhone to the computer. The program will automatically detect your device once connected.
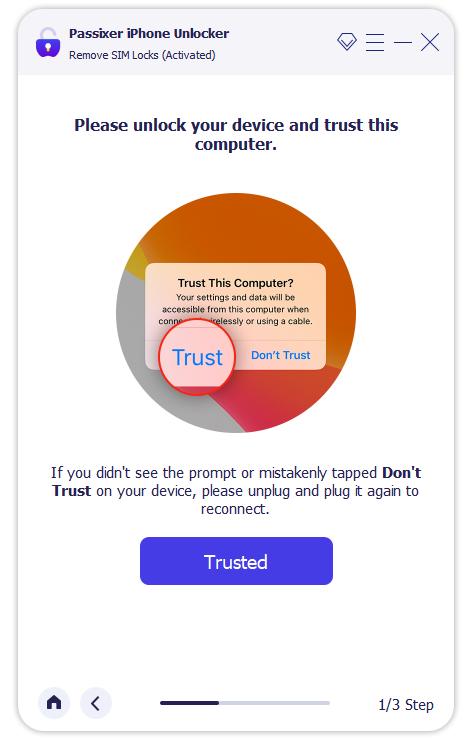
On your iPhone screen, enter your passcode to unlock the device. Then tap Trust when the pop-up message appears to allow the connection.
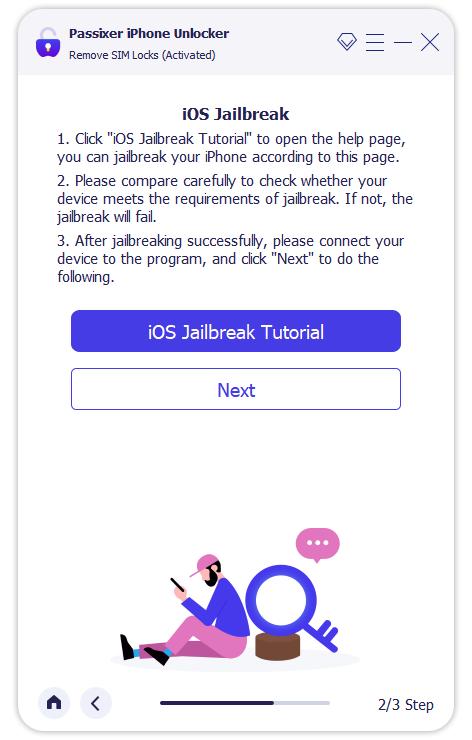
Click Start and choose iOS Jailbreak Tutorial to access the full jailbreak guide. Follow the on-screen instructions carefully. Once the jailbreak is complete, click Next to proceed.
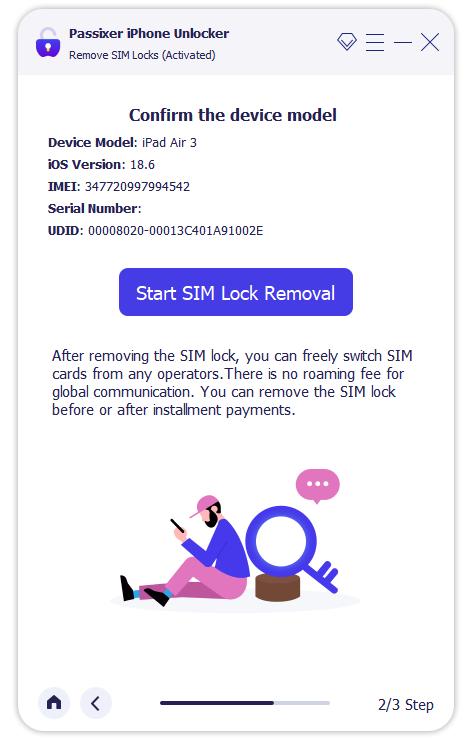
After the jailbreak, Passixer will detect your iPhone and display the device details. Confirm that the information is correct, then click Start SIM Lock Removal.
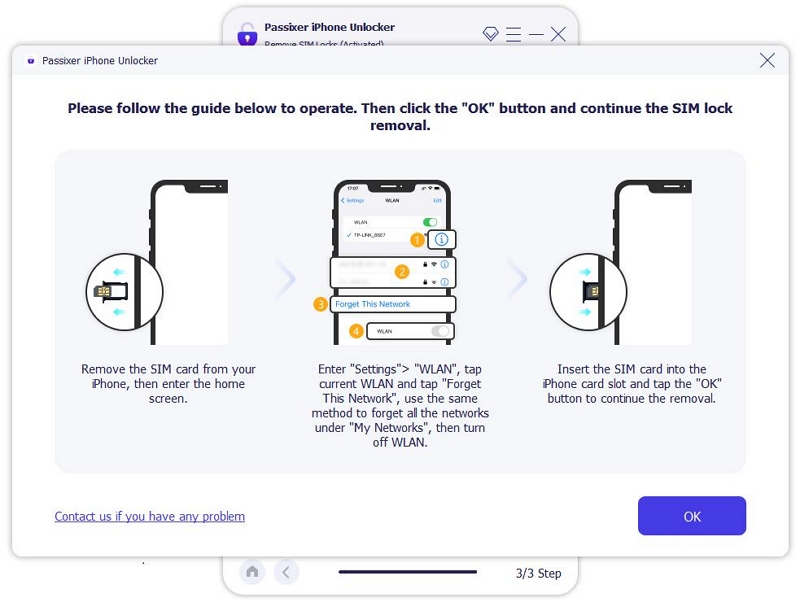
Before the SIM lock removal, go to your iPhone’s Wi-Fi settings and remove all saved networks. Then, switch off Wi-Fi completely to continue.
Passixer will now begin removing the SIM lock automatically. Ensure your iPhone remains connected during the process.
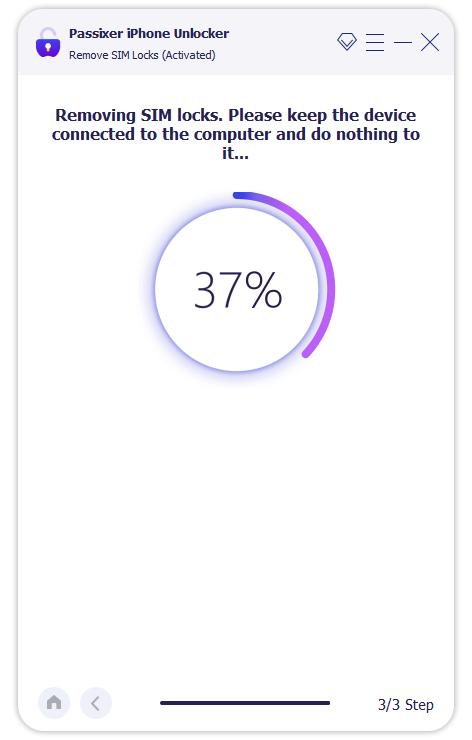
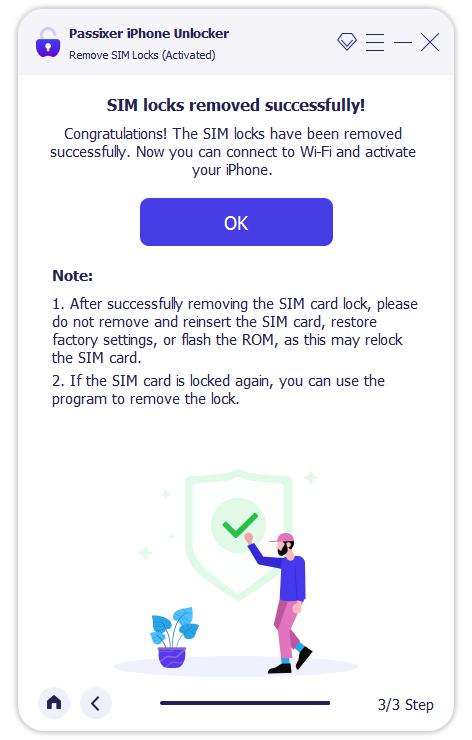
Wait for a few minutes until the process finishes. Once complete, you will see the success screen, and your iPhone is now SIM unlocked.
This method is reliable, secure, and works across all major iPhone models (iPhone 5s to iPhone X) as long as they fall into the supported iOS version range.
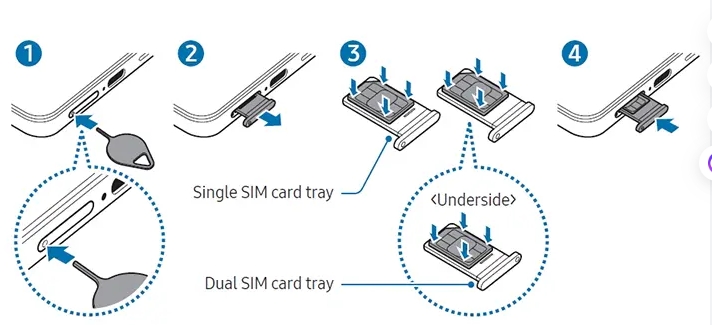
Solution 2. Check and Reinsert SIM Card Properly
Sometimes the error “SIM card not supported iPhone” simply comes from a misaligned or damaged SIM card. Power off your device, reinsert the SIM, or try another SIM card to confirm.
How to fix:
- Power off your iPhone and remove the SIM tray with the ejector tool.
- Wipe the SIM card gently with a dry cloth.
- Reinsert the SIM card properly and restart your iPhone.
If the error persists, try using another active SIM card from the same or different carrier.
Solution 3. Update iOS or Switch to eSIM
Many users report “the SIM in your old iPhone is not supported” after upgrading devices. Updating iOS to the latest version or activating an eSIM from your carrier often resolves compatibility issues.
Apple has been expanding eSIM-only iPhone models worldwide. Starting with the iPhone 17, some countries and regions — including the United States, Canada, Japan, UAE, Saudi Arabia, Qatar, Mexico, and Guam — no longer include a physical SIM tray. In these markets, the new iPhones (including the iPhone Air) are eSIM-only, so inserting a physical SIM card will always show the “SIM card not supported iPhone” error. If you live in these regions, you must set up an eSIM directly with your carrier.
Steps to update iOS:
Step 1: Go to Settings > General > Software Update.
Step 2: If an update is available, tap Download and Install.
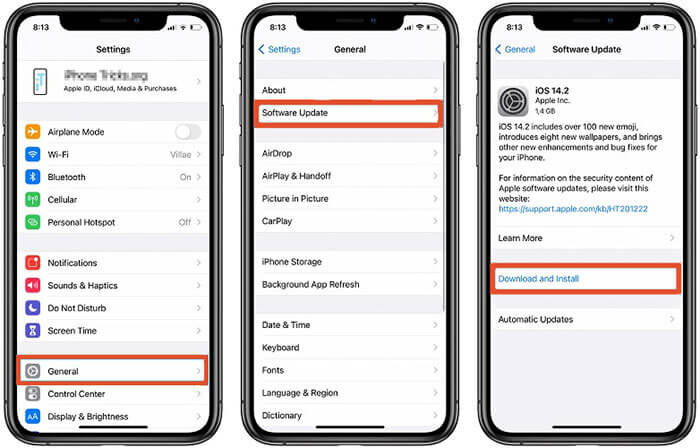
Step 3: Restart your iPhone after the update.
If you’re using a physical SIM, switching to an eSIM from your carrier may also solve compatibility problems.
Solution 4. Reset Network Settings
This method helps fix random iPhone SIM not supported errors caused by corrupted network configurations.
Steps to reset:
Step 1: Open Settings > General > Reset.
Step 2: Select Reset Network Settings.
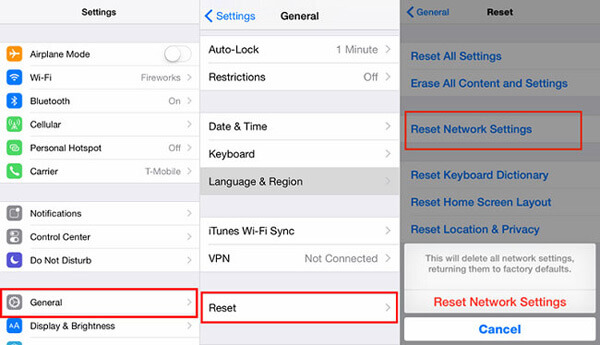
Step 3: Enter your passcode and confirm.
This will erase saved Wi-Fi networks and VPN settings.
Solution 5. Force Restart iPhone
A forced reboot is useful if your iPhone X SIM not supported message appears after a minor glitch.
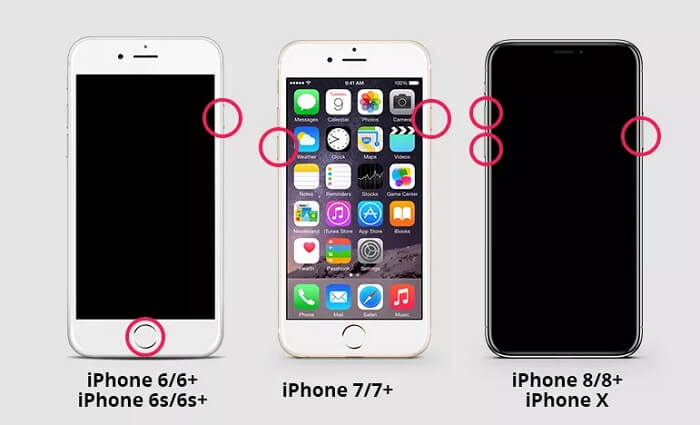
For iPhone 8 or newer models (including iPhone SE 2nd generation):
Quickly press and release the Volume Up, then Volume Down, then hold the Side button until the Apple logo appears.
For iPhone 7 or 7 Plus:
Hold Volume Down + Side button until you see the Apple logo.
For iPhone 6s or iPhone SE 1st generation:
Hold Home button + Side button until the Apple logo appears.
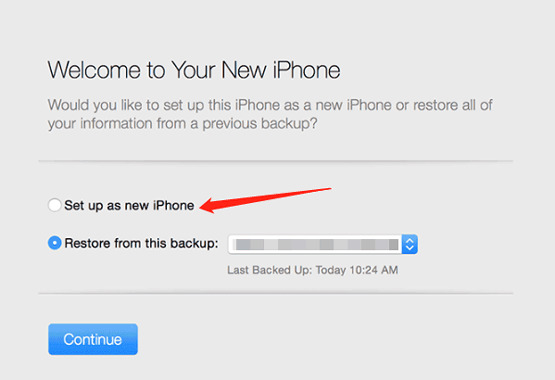
Solution 6. Activate SIM Card via iTunes
When activation fails, iTunes can often bypass the SIM not supported on iPhone screen and complete setup.
Step 1: Connect your iPhone to a computer with the latest iTunes.
Step 2: Select Set Up as New iPhone.
Step 3: Complete the setup process.
Step 4: Your iPhone should now activate with the SIM card.
Solution 7. Contact Carrier or Apple Support
If your iPhone SIM card not supported issue persists, the carrier may need to unlock it officially, especially for Verizon or AT&T customers.
- Contact your carrier to request an official unlock.
- If your iPhone is still under warranty, contact Apple Support for repair or replacement.
Part 3. Other Possible Fixes “iPhone SIM not supported” (3 Backup Options)
These are less common methods for iPhone SIM not supported bypass, but some users found them effective.
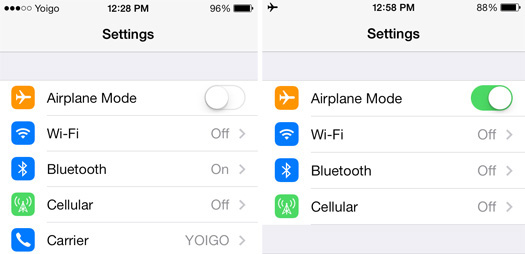
Option 1. Turn Airplane Mode On and Off
Useful when SIM not supported iPhone X happens after swapping SIM cards or traveling abroad. Toggling Airplane Mode can sometimes refresh the network connection.
Step 1: Open the “Control Center” on your iPhone.
Step 2: Press the “Airplane Mode” button to switch it on.
Step 3: After that, switch off this mode.
Step 4: Or, you can do all of this right from the iPhone “Settings”.
Option 2. Repair iOS with Passvers iOS System Recovery
If the SIM not supported error on iPhone is due to a software glitch, repairing iOS may help. Compared to the standard built-in iOS recovery options, these tools often provide more advanced features. But you have to be very careful while choosing the third-party tool. To help you, we would recommend using the Passvers iOS System Recovery tool. This tool can deal with more than 50 iOS system issues. It provides you with 3 different repair modes to solve different types of iOS problems. You can avoid data loss without having any technical knowledge.
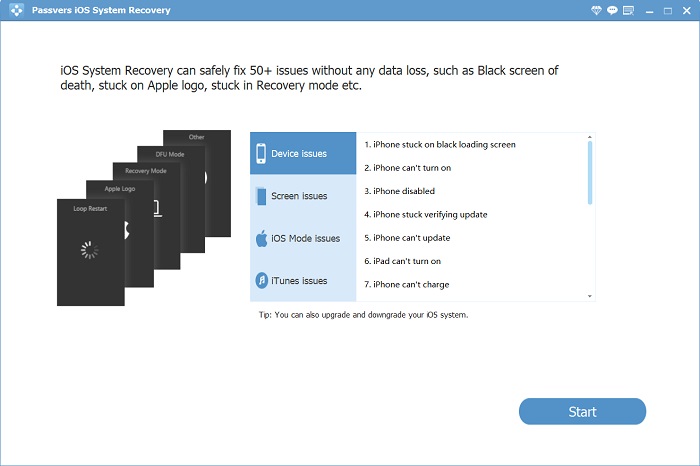
- Download and run Passvers iOS System Recovery.
- Choose a repair mode (Standard/Advanced).
- Download the firmware and repair your device without losing data.
Option 3. Try the Emergency Call Trick (Not Recommended)
Some users report that making an emergency call (e.g., dialing 112/911 then hanging up quickly) can bypass the setup screen and allow access.
Step 1: On the screen where you’re setting up your iPhone, just push the Home Button.
Step 2: Pick “Emergency Call” from the menu that pops up.
Step 3: Call 911 or 112, then hang up right after it connects and press the Home Button again. You’ll be able to reach the main screen of your iPhone.
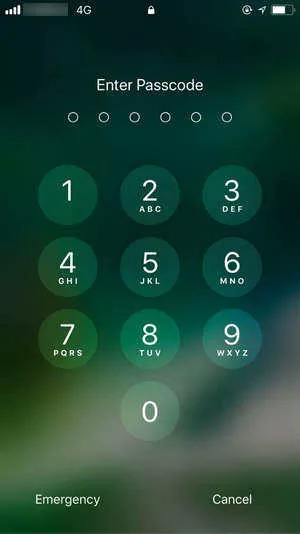
This method is unreliable, not recommended, and may not work on newer iOS versions.
Comparison of 10 Solutions to Fix SIM Not Supported iPhone
FAQs About SIM Not Supported iPhone
Conclusion
When your iPhone shows the message “SIM Not Supported”, it usually means there’s a carrier lock, activation issue, or software glitch. The good news is that this error can often be fixed with the right steps. In this guide, we shared 10 solutions — from checking your SIM card, updating iOS, switching to eSIM, to resetting network settings.
If the common fixes don’t work, reliable tools can save you time. Passixer iPhone Unlocker makes it simple to remove SIM restrictions and unlock your iPhone for any carrier. For users facing system glitches alongside SIM errors, Passvers iOS System Recovery is another safe option.
Whether you’re on an iPhone 11, 12, 13, 14, or the latest iPhone 17, following the methods above should help you get rid of the iPhone SIM card not supported issue and get your device back on track.