
If you’ve purchased a second-hand iPad, you may find it still linked to the previous owner’s Apple ID. This can prevent you from downloading or updating apps, using iCloud, iMessage, or other Apple services.
Removing Apple ID from iPad without password is essential to:
- Fully access your device features
- Protect your privacy
- Avoid activation lock or app update issues
This guide covers multiple scenarios: methods without password, methods with password, remote removal, iTunes solutions, tool recommendations, FAQ, and a comparison table for easy reference.
Part 1. Why Remove the Previous Owner’s Apple ID
Removing a previous Apple ID ensures:
- Full device control: You can access all functions freely
- Your own Apple ID usage: iCloud, App Store, iMessage, FaceTime
- Prevent software and update issues
- Protect your privacy: Prevent previous owner from remotely accessing your device
Part 2. Methods to Remove Apple ID from iPad Without Password
If you’ve bought a second-hand iPad or simply forgot the Apple ID password, don’t worry—there are several proven ways to remove the Apple ID and regain full access to your device. Below are five reliable methods ranging from fast software solutions to official Apple support options.
Method 1. Remove Apple ID via Passixer iPhone Unlocker (Fastest & Easiest Way)
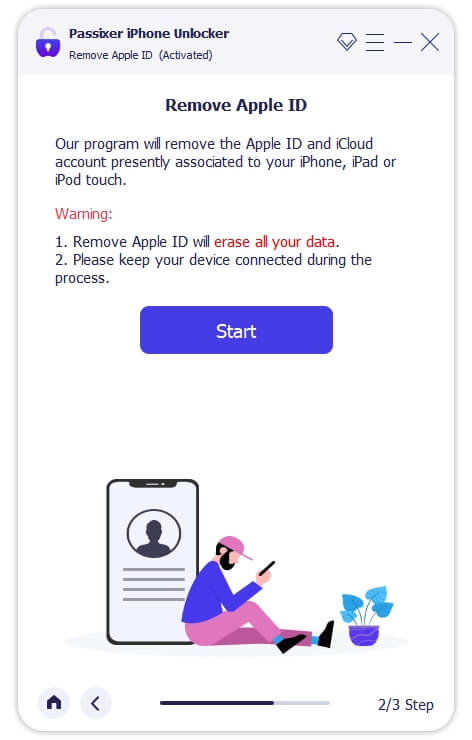
Passixer iPhone Unlocker, an Apple ID remover is your go-to solution when faced with Apple ID crises, as it helps you remove Apple ID from any iPad model freely without an Apple ID password. Using Passixer to get rid of Apple ID from iPad is simple and direct. Thanks to the simplified user interface, which allows anyone, whether tech-literate or not, to operate it without difficulty. This software offers the safest way to remove Apple ID from any iPad model, as it ensures a 100% success rate.
Open Passixer after installation. On the main interface, select Remove Apple ID to begin the process.

Use a certified USB cable to connect your iPhone or iPad to your computer. Tap Trust on your device if prompted.
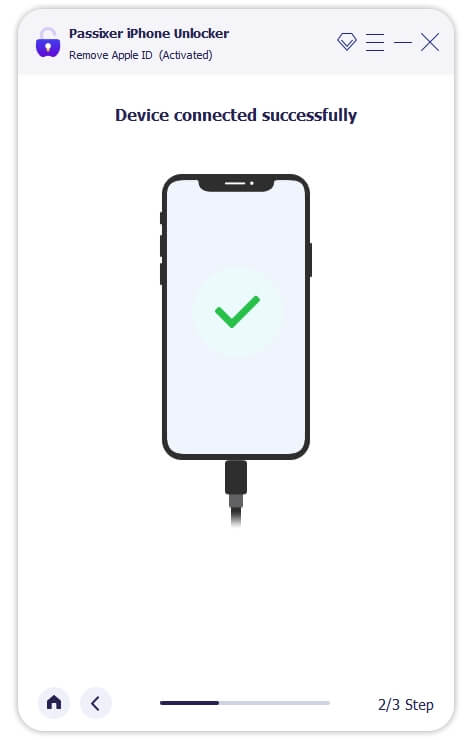
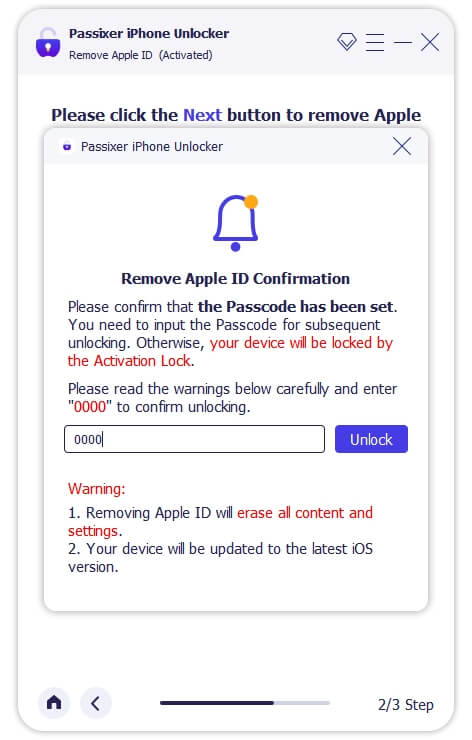
Click Start. The next steps depend on your iOS status: Find My Off: Removal begins automatically. All devices are supported to unlock Apple ID without data loss. Find My On (iOS 11.4 and earlier): Reset all settings via Settings > General > Reset > Reset All Settings, then Passixer starts removing the Apple ID. Find My On (iOS 11.4 and later): Ensure Two-Factor Authentication is enabled and a screen passcode is set. Confirm the removal by entering 0000 and clicking Confirm.
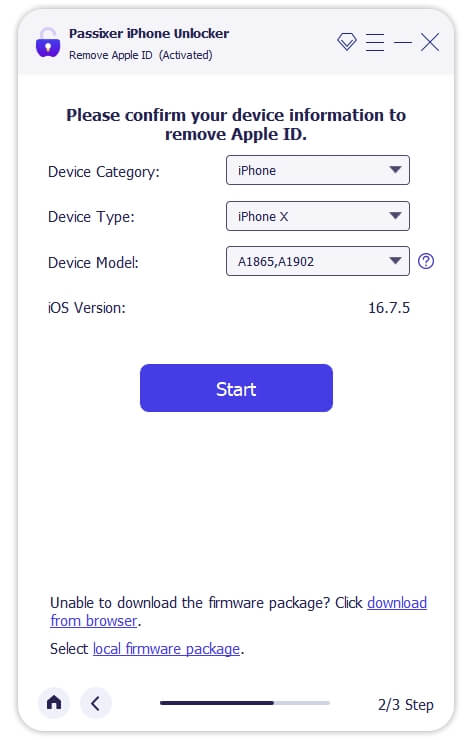
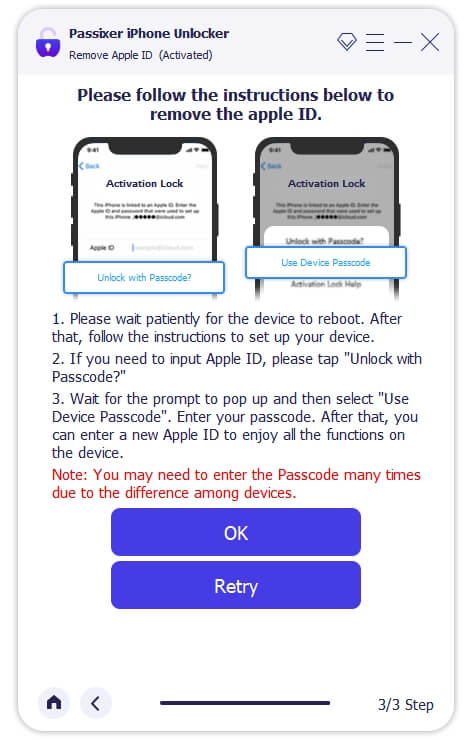
Passixer will detect your device and display its information. Confirm it, then click Start to download the required firmware package for Apple ID removal.
Once the firmware is downloaded, enter 0000 and click Unlock to start removing the Apple ID from your device.
After removal, unlock your device with the screen passcode and sign in with a new Apple ID to enjoy all Apple services.
Method 2. Sign Out via App Store (App Updates Only)
This method only disconnects App Store from the previous Apple ID. It does not remove iCloud or bypass Activation Lock.
Steps:
Step 1. Open Settings > your name > Media & Purchases.
Step 2. Tap View Apple ID > Remove this Device.

Step 3. Confirm that the account is logged out.
Useful if your goal is only to download or update apps without changing iCloud. This is not a full Apple ID removal; some iCloud features will remain linked to the previous ID.
Method 3. Factory Reset Your iPad
A factory reset erases all content and settings from your iPad.
Limitation: Find My iPad must be turned off, otherwise the device will remain activation locked.
Steps:
Step 1. Open Settings > General > Transfer or Reset iPad.
Step 2. Tap Erase All Content & Settings.

Step 3. Enter the device passcode if prompted.
Step 4. Confirm the reset. The iPad will restart as a brand-new device.
Make sure all important data is backed up, as this method erases everything. After reset, you can set up your own Apple ID. If Find My iPad is active, see Method 1 or Apple Support for removal solutions.
Method 4. Restore iPad via iTunes or Finder
This method allows you to restore the iPad via iTunes or Finder, effectively removing Apple ID in certain cases.
Limitation: Requires previous syncing with iTunes/Finder, and Find My iPad must be disabled.
Steps:
Step 1. Connect your iPad to a computer with iTunes (Windows/macOS Mojave or earlier) or Finder (macOS Catalina and later).
Step 2. Put your iPad into Recovery Mode:
- iPad with Face ID: Press and release Volume Up, press and release Volume Down, then press and hold the Top button until recovery mode screen appears.
- iPad with Home button: Press and hold Home + Top (or Side) buttons until recovery mode screen appears.
Step 3. iTunes/Finder will detect the iPad in recovery mode. Click Restore.

Step 6. Wait until the process completes; your iPad will restart.
Keep the iPad connected during the entire process. This is commonly referred to as remove Apple ID from iPad without password iTunes. If Find My iPad is enabled, this method may fail; in that case, use Method 1 or Apple Support.
Method 5. Contact Apple Support (Official & Secure Option)
If all other methods fail, Apple can help remove Apple ID officially with proof of purchase.
Steps:
Step 1. Visit Apple Support > Apple ID Issues.

Step 2. Choose Remove Apple ID from Device or related options.
Step 3. Provide the original purchase receipt or other proof of ownership.
Step 4. Follow Apple’s instructions; they may remotely remove the Apple ID or guide you through device setup.
Keep all device purchase documents handy. Apple may take a few days to process the request. This is the safest, official method if other solutions don’t work.
Part 3. Methods to Remove Apple ID With Password
If you still remember your Apple ID password or can recover it, removing your Apple ID from an iPad is much easier. These official methods let you safely unlink your Apple account and prepare your iPad for resale, gifting, or switching to a new account.
Whether you prefer using your device settings, iCloud.com, or Apple’s official portals, these methods work seamlessly and don’t require any third-party tools.
Method 1. Sign Out Directly from Device
The simplest way to remove an Apple ID from your iPad — if you know the password — is to sign out directly from the device settings.
Steps:
Step 1. Go to Settings > tap your Apple ID name at the top.
Step 2. Scroll down and tap Sign Out.

Step 3. Enter your Apple ID password to confirm.
Step 4. Choose whether to keep or delete data such as Contacts, Keychain, and Safari information.
Step 5. Tap Sign Out again to finalize.
Make sure your iPad is connected to Wi-Fi during sign-out. If you’re selling or giving away your device, choose “Delete from iPad” when asked about keeping data. After signing out, you can easily sign in with a new Apple ID.
Method 2: Remove Apple ID via iCloud Website
If your iPad is not physically accessible, you can remove the Apple ID remotely from iCloud.com. This is ideal when you’ve sold or gifted the device but forgot to unlink your account.
Steps:
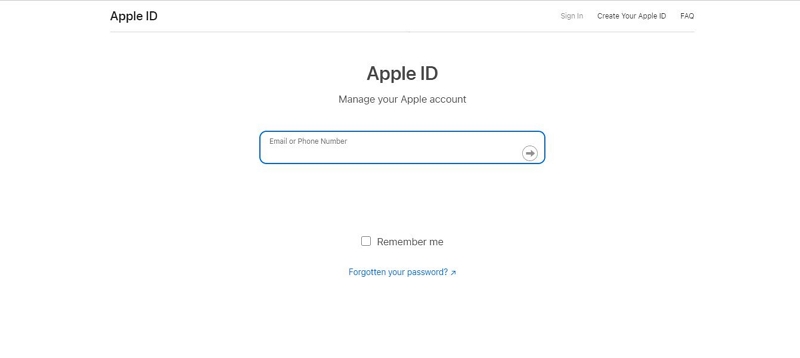
Step 1. Visit iCloud.com and log in with your Apple ID.
Step 2. Click Find My iPhone.
Step 3. Go to All Devices > select the iPad you wish to remove.
Step 4. Click Remove from Account.

Step 5. Confirm your selection.
This method works best when the iPad is online and connected to the internet. Once removed, the device will no longer be linked to your Apple ID and can be set up by a new user. This process effectively removes Apple ID from iPad without password remotely if you already have iCloud access.
Method 3. Use Find My App
If you own another Apple device (like an iPhone or Mac), you can use the Find My app to remove your Apple ID remotely.
Steps:
Step 1. Open the Find My app on another Apple device.
Step 2. Tap Devices at the bottom.
Step 3. Select your iPad from the list.
Step 4. Swipe up and tap Remove This Device.

Step 5. Confirm with your Apple ID password if prompted.
Useful if your iPad is lost, sold, or inaccessible. The “Erase iPad” option will wipe all data and unlink your Apple ID. After erasing, you or the new owner can sign in with a new Apple ID.
Method 4. Apple Data & Privacy Portal
If you no longer plan to use your Apple account, you can delete your Apple ID entirely through Apple’s official Data & Privacy portal. This process removes your account and all associated data from Apple’s servers permanently.
Important: Once deleted, you’ll lose access to iCloud, App Store, Apple Music, and all other Apple services tied to your Apple ID. Make sure to back up or transfer any important data before proceeding.
Steps:
Step 1. Launch a browser and go to privacy.apple.com. Enter the Apple ID credentials for the account you want to remove.
Step 2. If Apple asks for two-factor verification, retrieve the code sent to your trusted device or phone and submit it to continue.

Step 3. Locate the option for deleting your account (usually shown as “Delete Your Account” or similar) and choose the link to begin the removal process.

Step 4. Pick a reason from the provided list when requested, then proceed through the guided prompts.

Step 5. Apple will issue a one-time Unique Access Code — copy or print this code and store it safely (you’ll need it if you want to check status or reverse the request). Confirm the code as instructed and move forward.

Step 6. Follow the remaining confirmations and submit the final request to delete the account. Apple will acknowledge the request and start the verification.

What happens next:
Apple reviews the request; there is a short waiting window (usually around seven days) while your account remains active. After that period and successful verification, the Apple ID and its associated data are permanently removed.
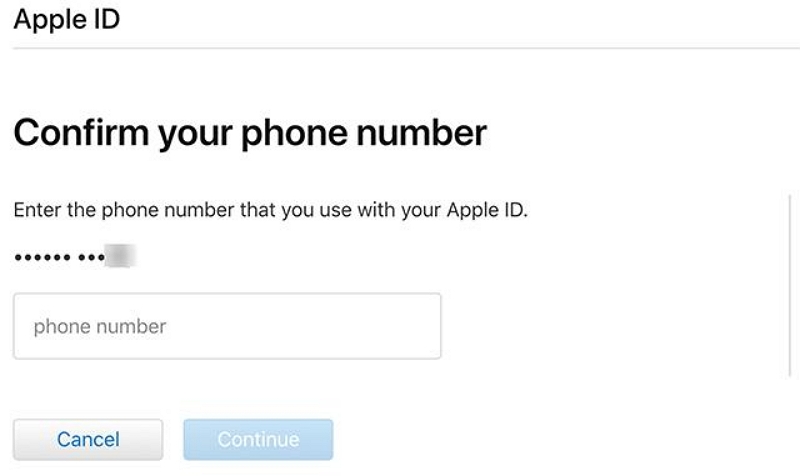
Method 5. Reset Apple ID Password
If you’ve forgotten your Apple ID password but still have access to the registered email or trusted phone number, you can reset it via Apple’s recovery system.
Steps:
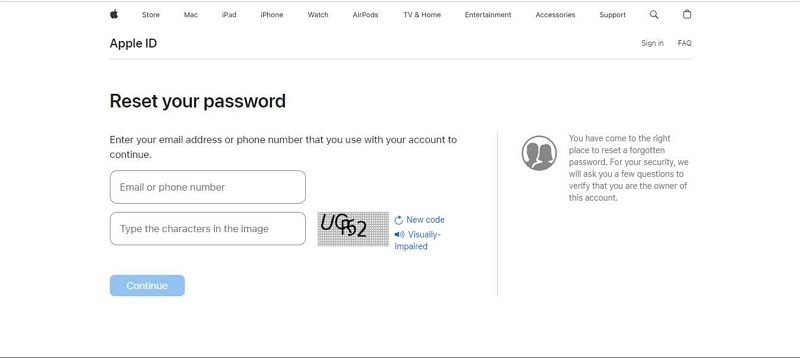
Step 1. Open a browser and go to iforgot.apple.com.
Step 2. Type the Apple ID email address associated with the device and submit.
Step 3. Follow the on-screen prompts to prove you own the account. Apple will offer verification options such as:
- Sending a code to the registered email, or
- Sending an SMS code to the trusted phone number, or
- Asking security questions (if still available).
Step 4. In some flows you may first enter a phone number and then be asked to confirm the email on file (or vice versa). Provide the requested info and continue.
Step 5. If Apple displays a prompt on a trusted iPhone/iPad (e.g., a message asking to Allow password reset), tap Allow on that device and follow any on-screen steps to continue.
Step 6. Once verification succeeds, set a new, strong Apple ID password and confirm it.
Step 7. Return to the iPad: Settings > [Your Name] > Sign Out (enter the Apple ID and the new password if requested). After signing out, sign in with your own Apple ID or the recovered account as needed.
Enable two-factor authentication afterward to avoid future lockouts. Once the password is reset, you can easily remove Apple ID from iPad using Method 1 or 2. If verification fails, you may need to wait for Apple’s recovery period (usually 24–48 hours).
Part 4. Create or Switch to a New Apple ID
Once the previous Apple ID has been removed from the iPad, you can create a brand-new Apple ID or sign in with an existing one. Below are the correct, detailed steps for creating an Apple ID on the iPad, creating via Apple’s website (alternate), and switching accounts safely.
A. Create a New Apple ID on the iPad (recommended)
Step 1: Open Settings > tap Sign in to your iPad.
If another Apple ID is logged in, tap the name > Sign Out.
Step 2: Tap Don’t have an Apple ID or forgot it? > Create Apple ID.

Step 3: Enter your name and birthdate, then tap Next.
Step 4: Choose to
- Use an existing email, or
- Create a free iCloud email (e.g., name@icloud.com).
Step 5. Set a strong password and tap Next.
Step 6. Enter a phone number for verification > enter the code sent by Apple.
Step 7. Read and agree to the Terms & Conditions.
Step 8. Complete verification and sign in automatically..
Step 9. Turn on iCloud services such as Find My iPad, Photos, or Backup.
Use a unique password and enable two-factor authentication (2FA). Keep your recovery email and phone number updated to ensure you can always regain access to your Apple ID.
B. Create via Apple’s Website (Alternative)
Step 1: Go to appleid.apple.com > click Create Your Apple ID.

Step 2: Fill in your details (name, country, email, password).
Step 3: Verify your email and phone number.
Step 4: On the iPad, go to Settings > Sign in to your iPad, and log in with your new Apple ID.
Creating an Apple ID online allows you to use your preferred email address for login and account recovery.
C. Switch to a New Apple ID
Step 1: Back up your data to iCloud or your computer.
Step 2: Sign out old Apple ID: Settings > name > Sign Out > enter password.

Step 3: Restart the iPad.
Step 4: Sign in with your new Apple ID and enable desired services.
Step 5: Open the App Store to confirm you’re using the correct Apple ID.
Part 5. FAQs
- Buy from reputable sellers.
- Check the carrier lock status.
- Ensure Activation Lock is turned off.
- Test all device functions before purchase.
Conclusion
This guide covers how to remove Apple ID from iPad without password, including:
- Using third-party tools (fastest method)
- iTunes / Finder methods
- Remote iCloud removal
- Device settings with password
For users seeking the fastest, safest, and highest success rate, we recommend Passixer iPhone Unlocker, which works without password and supports the latest iOS.
Reminder: Always backup data before performing Apple ID removal for safety.
Remove Apple ID from iPad without a password (when you are the device owner). Supports Apple ID removal, MDM unlock and screen passcode removal for iPhone, iPad and iPod.
Tell me, will you remove this
Hi there,
Thank you for your comment. We apologize, but it appears the image you attached isn’t displaying properly on our end, so we’re unable to view it to understand the issue fully.
To ensure we can provide you with the best assistance, please contact our dedicated support team directly via email at passixer@eassiy.com. Please include a description of the issue and attach the image there.
Our team will be happy to help you resolve this promptly.
Regarding your interest in Passixer’s capabilities, you are correct! Passixer is professionally designed to assist with the removal of various locks, including Apple ID, Screen Passcode, and MDM. For detailed information on features and official guides, please visit our official website: https://www.passixer.com/
We look forward to assisting you via email!
How to remove iCloud from iPhone
If you need to remove the iCloud activation lock, please follow the official procedures to ensure the security of your device and data. Common methods include:
1. Contact the original owner and ask them to remove the device from their Apple ID (they can sign in to iCloud.com → Find My → Devices and remove the iPhone).
2. If you are the lawful owner, bring the original proof of purchase (receipt/invoice) to Apple Support or an Apple Store — they can assist with removing Activation Lock after verifying ownership.
For full instructions and official guidance, please consult Passixer pages about Activation Lock(https://www.passixer.com/icloud/bypass-activation-lock-iphone.html).