
Recover Photos from a Broken iPhone doesn’t have to be impossible. Whether your screen is shattered, the device won’t power on, or it suffered water damage, you can still retrieve precious memories. With the right tools and step-by-step methods, you can safely recover lost photos and get your important images back in no time.
Part 1: Common Scenarios of Broken iPhone
Your iPhone is special, but still, it is a machine. It can get stuck, or the screen can crack. Let’s discuss some typical scenarios that can cause damage to your iPhone.
1. iPhone screen cracked, but still working
You could have accidentally dropped your iPhone on the floor. The phone itself is durable and capable of enduring such shocks. However, the glass screen can crack, especially if it lacks adequate protection. Under such circumstances, the iPhone can still work with a cracked screen.

2. iPhone won’t turn on or has a dead battery
Generally, a lithium-ion battery lasts comfortably for two to three years, after which it may lose its ability to hold a charge. Exposure to extreme temperatures, such as a hot car or freezing environment, can temporarily disable its battery or cause permanent damage. Hardware issues, like a faulty charger, can also cause the iPhone battery to appear dead when it’s not. Under such circumstances, the iPhone might not switch on.

3. Water-damaged iPhone
Typically, iPhones are water-resistant. However, continuous exposure to moisture can short-circuit internal components, including the battery and the logic board. The iPhone would refuse to switch on. It can be a cause for worry as you risk losing critical data. A severe drop or a hard fall can disconnect internal battery connectors or even damage the motherboard.

4. Stuck in Apple logo / Recovery mode / DFU
A failed iOS update can freeze the boot sequence and cause the iPhone to get stuck in the Apple logo. Similarly, modifying system files can destabilize the OS. Malware can corrupt your iPhone’s system files. You may even accidentally trigger Recovery Mode when troubleshooting. Using Deep recovery methods can be risky and cause the iPhone to get stuck in DFU mode. Under such circumstances, you risk losing data.
![]()
Part 2: Pre-Recovery Checklist
We have discussed some common scenarios where your iPhone can become damaged, potentially leading to the loss of critical data, including photos and videos. That brings us to the question: Can you recover photos from a damaged iPhone? The answer is Yes. This pre-recovery checklist simplifies your recovery job and ensures your memories remain secure.
Check iCloud Photo sync status
Before attempting recovery, log in to iCloud.com using your Apple ID and verify that your photos are visible. If you have enabled iCloud Photo Library, your images are likely synced and accessible, even if the device becomes unusable.
Verify iTunes/Finder backup availability
If you have not enabled iCloud Photo Library, your photos will still be safe. You can connect your computer and open iTunes (Windows/MacOS Mojave) or Finder (macOS Catalina and later). Go to Preferences > Devices to check if a backup exists. The most recent backup may contain your photos.
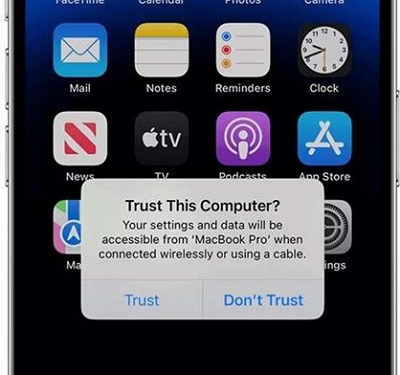
Confirm computer recognition (USB trust, drivers, cable)
Plug the damaged iPhone into your computer and check if it is detected. You should see a prompt to “Trust This Computer” on your device. If not, try using a different USB cable, port, or updating the driver, as recognition is essential for direct data extraction or backup restoration.
Part 3: How to Recover Photos from a Broken iPhone (All Methods)
You can recover your photos from a broken iPhone in various ways, depending on whether you have a backup or not.
Method 1. Recover Photos via iCloud.com
Usually, you would have enabled iCloud backup on your iPhone and set it to automatic. Under such circumstances, recovering from iCloud backup is easy.
Step 1: Go to iCloud.com, preferably from a desktop browser (because your iPhone is damaged).
Step 2: Sign in using your Apple credentials.
Step 3: Click on Photos
Step 4: Browse and select the photos you want to recover
Step 5: Click the Download icon to save them to your computer

If you don’t have a PC, you can access iCloud Photos from another iPhone or iPad using your Apple ID and password.
Method 2. Restore from iTunes or Finder Backup
If you had not enabled iCloud Backup, you could still recover your photos, especially if you’ve backed up your iPhone to your PC. Windows or macOS (Mojave and earlier) users can use iTunes, while macOS (Catalina and later) users can use Finder.
Step 1: Connect a new or working iPhone to your PC.
Step 2: Open iTunes or Finder on your PC.
Step 3: Select the device and click Restore Backup
Step 4: Choose the most recent backup and click Restore
Step 5: After setup, open the Photos app to view the recovered images.

This method overwrites existing data.
Method 3. Direct Transfer if Screen/Touch Works
Consider the situation where the screen is broken but is still responsive. You can manually transfer photos to another device.
Step 1: Unlock your iPhone and connect it to your PC using a USB cable.
Step 2: Tap “Trust this Computer” when prompted.
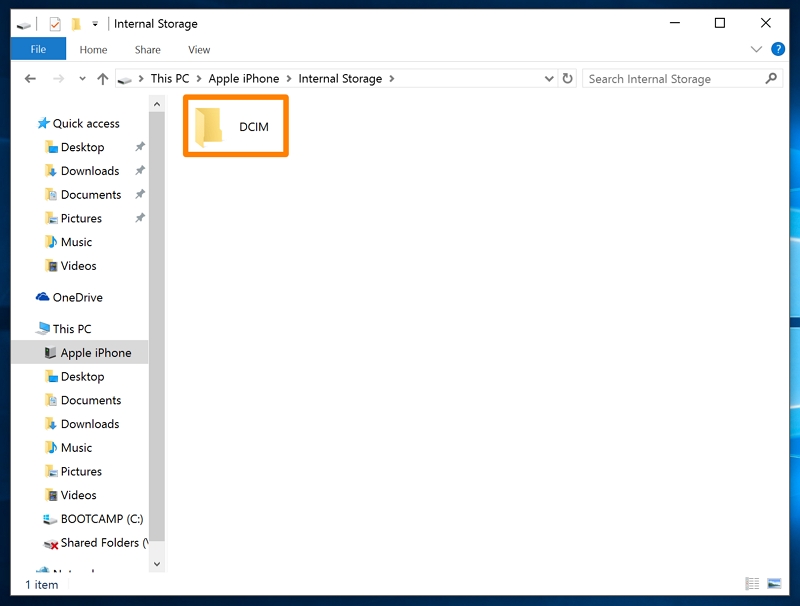
Step 3: Open File Explorer (Windows) or Image (Mac).
Step 4: Navigate to the DCIM folder and copy the photos to your PC.
If the screen is partially responsive, use an OTG adapter with a mouse to navigate and unlock the device.
Method 4. Retrieve Photos from Email / Social Apps
If you don’t have iCloud or iTunes/Finder backup, you can still recover your photos from email and social media apps.
Step 1: Check your social media apps, such as email, WhatsApp, or other programs through which you distribute your photos.
Step 2: Open the respective app on another device.
Step 3: Search for your photos. For emails, search using keywords such as “photos” or “images.” For messaging apps, tap chat logs or the app’s media search options.
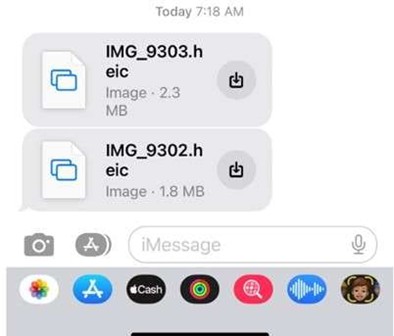
Step 4: Choose the images you want to recover. Download them to your device.
Step 5: Store the photos using cloud storage options.
This method is tedious but still works.
Method 5. Use External Photo Recovery Software
If Methods 1 to 4 do not work, you can try external photo recovery software such as Eassiy, Dr. Fone, iMobie PhoneRescue, or EaseUS MobiSaver.
Supports iCloud and iTunes
Device scan for selective recovery Full iOS recovery
System repair tools included Focuses on media and message recovery
Selective restore from backups Lightweight tool for recovering photos/videos
Supports direct device scan and iTunes
Personal license $59.95 annual
iOS toolkit $49.99 annual
Single device $39.95 annual
Personal license
Guided recovery
Preview available Polished interface
Bundled with other tools Intuitive layout
Fast scan
Preview available Simple to use
Minimal setup
As a user, you have various choices. We have compared four popular options.
Method 6. Best Overall Solution – Eassiy iPhone Data Recovery
From the comparison table above, it is evident that Eassiy iPhone Data Recovery is the best overall solution. Eassiy is a user-friendly software tool ideal for recovering lost iPhone data, especially when you do not have backup options.
Step-by-Step Process
Visit the Eassiy official website and download the software. Install it on your computer.
Connect your iPhone to the computer using a USB cable. Open Eassiy, select iPhone Data Recovery, and click on “Recover from iOS device.”
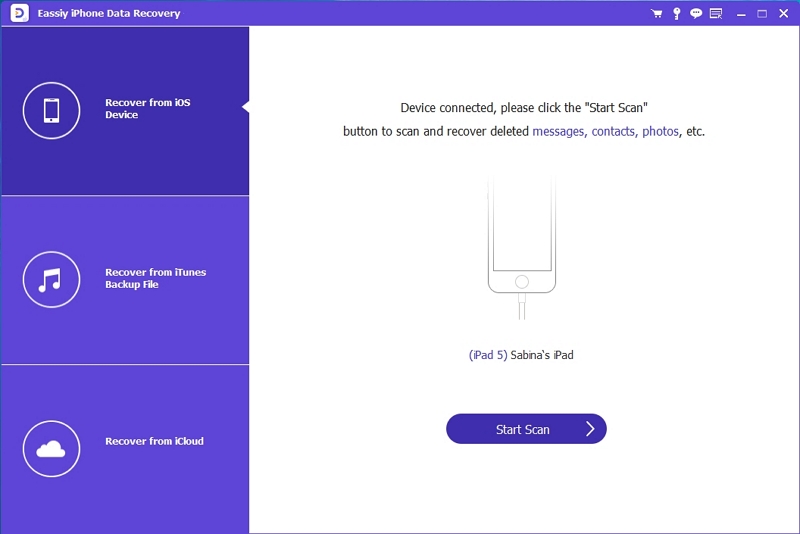
Click “Start Scan” to allow the software to search your iPhone for missing data.
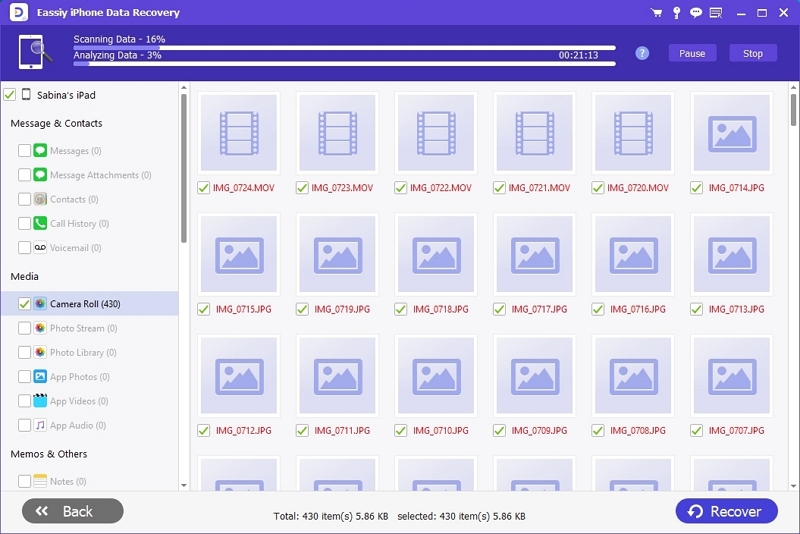
Once the lost files appear, preview them and select the images you want to recover. Click “Recover” to start the recovery process.

Part 4: Troubleshooting Different Scenarios
Let’s troubleshoot the different scenarios discussed earlier.
Scenario 1 – iPhone won’t power on
Step 1: Charge the device for 30 minutes
Step 2: Perform a force restart.
Step 3: If the device is still dead, recover it from iCloud or iTunes/Finder backup as outlined earlier.
Scenario 2 – iPhone not recognized by PC
Option 1: Try using a different cable and port.
Option 2: Try a different computer, preferably one that has synced with the iPhone before.
Option 3: Ensure Apple Mobile Device USB driver is installed (only on Windows)
Option 4: If the screen is functional but the touch isn’t, use an OTG adapter and a mouse to unlock and trust the computer.
iPhone stuck in Recovery/DFU
Step 1: Connect your iPhone to a computer and open iTunes/Finder.
Step 2: Choose Update (not Restore) – it fixes the OS without erasing data
Step 3: If the update fails, try using Eassiy to safely exit Recovery Mode.
Part 5: Recover Photos without Backup (Recommended Solution)
“If your iPhone has no backup, you can directly use Eassiy. The process is the same as in Method 6. In short: connect your device → scan → select photos → recover.”
In a no-backup scenario, Eassiy is the only viable solution, since iTunes or iCloud require an existing backup and cannot retrieve data that was never synced.
Part 6 – Post-Recovery Tips
These post-recovery tips can help prevent future losses.
1. Backup strategies: Enable iCloud for automatic cloud synchronization. Pair it with regular backups via iTunes/Finder. This dual-layer approach ensures redundancy in case of device failure, theft, or accidental deletion.
2. Best practices for photo organization: Categorize your photos efficiently using albums, tags, and data-based folders. Clean duplicates and remove blurry shots to save space. Use AI-powered apps like Apple Photos or Google Photos for smart sorting and facial recognition.
3. Prevent future loss: Avoid deep battery discharge, update your device regularly, and enable “Find My iPhone” for remote access. Consider automatic cloud syncing for WhatsApp and other media-heavy apps to reduce your dependency on device storage.
FAQs
Conclusion
Breaking your iPhone is stressful. The fear of losing your photos and memories brings greater stress. However, you don’t need to panic because we have discussed various methods that can help you easily recover your photos from a broken iPhone. While recovering from existing backups is convenient, tools like Eassiy enable recovery even in the absence of backups.