
If you’ve forgotten your iPhone passcode or entered the wrong password too many times, you might wonder how many attempts to unlock iPhone before it gets disabled. Once you exceed Apple’s passcode limits, your device will display “iPhone is disabled” or “Security Lockout.”
In this guide, we’ll explain the exact number of attempts allowed, what happens after repeated failures, and the best solutions — including free methods, iPhone unlock tools, and Apple support — to regain access on iOS 15 through iOS 17.
Part 1. iPhone Passcode Attempt Limits
Apple limits the number of incorrect passcode attempts. Each failed attempt triggers different warnings and lockout durations:
Note: If Erase Data is enabled (Settings > Face ID & Passcode / Touch ID & Passcode), your iPhone will automatically erase after 10 failed attempts.
Part 2. What Happens After Multiple Failed Attempts
After repeated failed attempts, your iPhone may:
- Display “iPhone is disabled” or “Security Lockout”
- Temporarily lock with increasing time delays
- Erase all data if Erase Data is enabled
- Require connection to iTunes or Finder for a full restore
Expert Insight: Each failed attempt counts against the security limit, so avoid guessing randomly. A controlled approach—like using an unlock tool or iCloud—is safer.
It offers a safe, quick solution to remove screen passcodes with just a few clicks.
Part 3. How to Unlock iPhone After Multiple Failed Attempts
When your iPhone shows “Security Lockout” or “iPhone is disabled,” try one of the following methods:
Method 1: Use Passixer iPhone Unlocker
Passixer iPhone Unlocker is a professional tool designed to unlock disabled or unavailable iPhones quickly and safely. It works without Apple ID, iTunes, or iCloud, supports all types of passcodes (4-digit, 6-digit, Face ID, Touch ID), and is compatible with all iPhone models. The program ensures device functionality is preserved after unlocking, making it a reliable choice for both beginners and advanced users.
Download the software on your Windows PC or Mac, then follow the installation prompts. This sets up the program so you can start unlocking your iPhone safely.
Launch the program and choose Wipe Passcode from the main interface. This tells the software that you want to remove the iPhone screen lock.

Use a USB cable to connect your locked iPhone to the computer. The program will detect your device automatically. Confirm the device info to ensure the correct firmware is downloaded for your model.

Follow the instructions on the screen. Enter “0000” or any other code the program prompts, then click Unlock to begin removing the passcode.

The program will erase the passcode and restore access to your iPhone. Once completed, your device will be updated to the latest iOS version. Make sure to backup your data beforehand, as unlocking will erase all existing content.

Passixer iPhone Unlocker provides a fast and effective solution for unlocking iPhones after multiple failed passcode attempts. It is suitable for all users, preserves device integrity, and eliminates the frustration of being permanently locked out.
Method 2: Unlock via Apple ID and Erase iPhone
If your iPhone is running iOS 15.2 or later and you have your Apple ID credentials, you can use the Erase iPhone feature to unlock a disabled device without the passcode. This method resets the iPhone, so all data will be erased. Make sure you have a backup if you want to restore your content afterward.
Requirements:
- iOS 15.2 or later
- iPhone connected to Wi-Fi or cellular
- Apple ID credentials used on the locked device
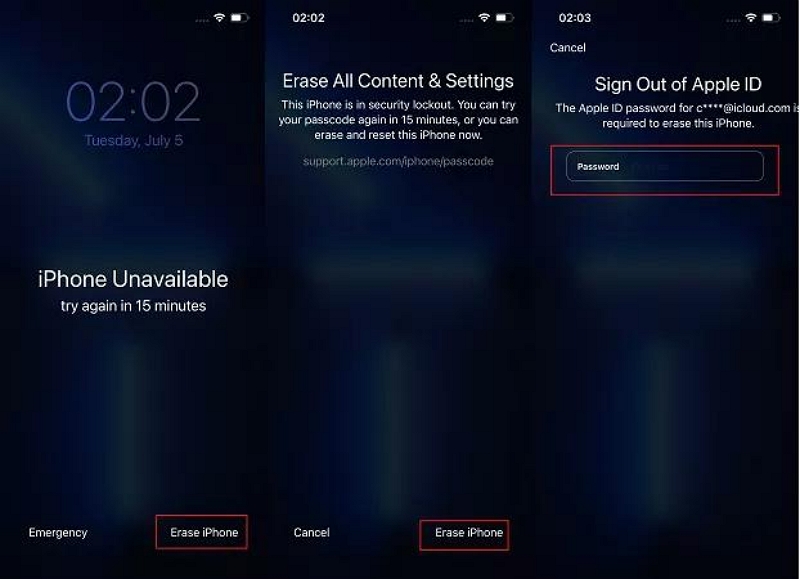
How to Unlock iPhone Screen Lock via Apple ID and Erase iPhone:
Step 1. After 7 incorrect attempts, tap Erase iPhone on the lock screen
Stpe 2. Confirm Erase iPhone again
Step 3. Enter Apple ID password to confirm
Step 4. iPhone will reset; set a new passcode
Limitations:
- Requires network connection
- Only works on iOS 15.2+
This is a quick, official way to regain access without a computer, but it’s essential to have your Apple ID credentials ready. If your Apple ID is not linked or the device is offline, this method won’t work.
Method 3: Unlock iPhone via iCloud
If your iPhone is disabled and Find My iPhone is enabled, iCloud offers an easy way to erase your device and regain access. This method removes all data and the passcode, so having a backup is recommended.
Requirements:
- Find My iPhone enabled on the locked device
- Apple ID and password associated with the iPhone
Step-by-Step Instructions:
Step 1. Visit iCloud.com from another device and sign in.
Tip: Make sure you’re using the same Apple ID that’s linked to your locked iPhone.
Step 2. Click Find My → All Devices → select the locked iPhone.
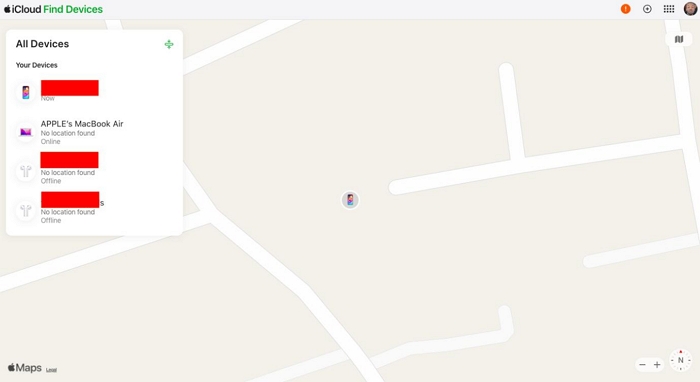
Step 3. Click Erase This Device to wipe it.
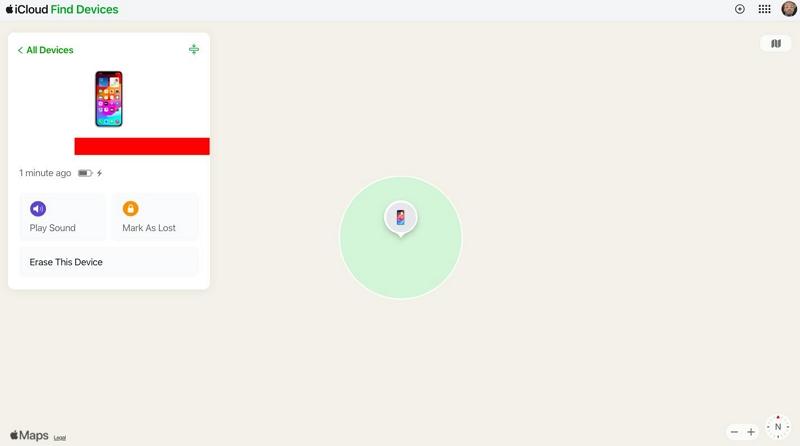
Step 4. Wait for the iPhone to restart. Once it powers back on, you can set a new passcode and restore your data from a backup.
This is a convenient method for users without a computer. However, it requires the iPhone to be online and the Apple ID credentials ready. If Find My iPhone is not enabled, this method won’t work. All data on the device will be permanently erased. Always ensure you have a backup available before using this method.
Method 4: Restore via iTunes / Recovery Mode
Best for:
- Devices that cannot be unlocked via Apple ID or iCloud
- Force restoring the iOS
If your iPhone is permanently disabled or cannot be accessed with Apple ID/iCloud, iTunes (or Finder on Mac) offers a reliable way to restore your device to factory settings. This method erases all data and passcodes, so a backup is highly recommended.
Step-by-Step Instructions:
Step 1. Open iTunes (or Finder on Mac).
Step 2. Put iPhone into Recovery Mode:
- iPhone 6s or earlier: Hold Home + Power
- iPhone 7 / 7 Plus: Hold Side + Volume Down
- iPhone 8 or later: Volume Up → Volume Down → Hold Side
Step 3. When iTunes/Finder detects your device in Recovery Mode, you’ll see a prompt to Restore or Update. Choose Restore iPhone to erase all data and reinstall iOS.

Step 4. After restoring, set up iPhone as new. This erases all data. Backup is required.
If your iPhone is unable to connect to iTunes, you can find specific help here: My iPhone is Disabled and Won’t Connect to iTunes
If your iPhone has never been synced with iTunes before, don’t worry—you can still unlock it. Simply follow the Recovery Mode steps outlined above. If you’ve synced iTunes previously: the process may be faster since your computer is already authorized to communicate with your iPhone, and you may restore your device without entering Recovery Mode. If you’ve never synced iTunes: Recovery Mode ensures that your iPhone can still be recognized by iTunes or Finder, allowing you to restore it and remove the screen passcode.
Most users forget if they’ve synced iTunes before. It’s safe to follow the Recovery Mode steps for all iPhone models. This method is the most reliable way to regain access when other solutions fail. This method erases all data on the iPhone. Make sure to back up your data beforehand if possible.
Method 5: Contact Apple Support or Visit an Apple Store
If all else fails, use official Apple support:
Official support is the safest route, ideal for sensitive devices or important data.
Method 6: Reset Passcode Using Old Passcode (iOS 17+)
Apple introduced a new feature in iOS 17 that lets you reset your forgotten passcode using the previous one within 72 hours of change.
Requirements:
- iOS 17 or later
- You must remember your old passcode
- Reset must be done within 72 hours of passcode change
Steps:
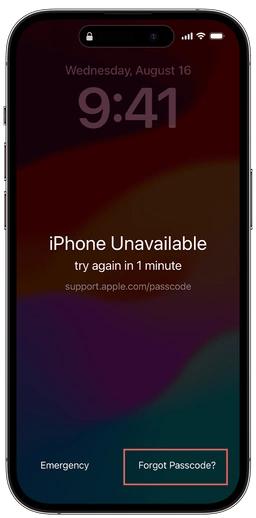
- On the lock screen, tap Forgot Passcode?
- Select Enter Previous Passcode.
- Input your old passcode to verify your identity.
- Create a new passcode for your device.
Limitations:
-
Works only if you recently changed your passcode.
-
If you don’t remember the old passcode or 72 hours have passed, you must use other unlock methods (iTunes, iCloud, Apple ID, or unlocker tools).
Expert Note: This is the most user-friendly option if available, since it resets the passcode without erasing your data. Unfortunately, it doesn’t help for long-term forgotten passcodes or disabled devices.
Part 4: Tips to Prevent iPhone Lockouts
Preventing an iPhone lockout is much easier than recovering a disabled device. Follow these expert-recommended tips to keep your device accessible and secure:
1. Use a strong, memorable passcode.
Choose a combination that is hard to guess but easy for you to remember. Avoid simple sequences like “1234” or repeated digits.
2. Enable Face ID / Touch ID to reduce passcode entries.
Using biometric authentication reduces the need to type your passcode repeatedly, minimizing the risk of entering it incorrectly.
3. Store passcodes securely in a password manager.
Password managers keep your credentials safe and accessible without relying on memory alone.
4. Keep a written backup in a secure place
Writing down your passcode in a safe, encrypted location (like a journal or secure file) ensures you have a fallback if you forget.
5. Back up your iPhone regularly
Frequent backups to iCloud or your computer protect your data from permanent loss in case of repeated failed attempts.
Expert Tip:
Even with Face ID or Touch ID, occasional passcode entries are required. By combining strong passcodes, biometric security, and regular backups, you can avoid the frustration of an iPhone lockout entirely.
FAQs
Conclusion
Exceeding the allowed passcode attempts can permanently lock your device. If you’re wondering how many attempts to unlock iPhone safely, the answer is up to 10 tries before it’s disabled. Once locked, you can regain access via Passixer Unlocker, Apple ID, iCloud, iTunes/Recovery Mode, or official Apple Support.
Expert Recommendation: For sensitive devices, prioritize official Apple channels. For faster recovery, tools like Passixer Unlocker or iCloud are efficient. Always keep regular backups to avoid data loss from future lockouts.