
Auto-Lock on the iPhone is helpful. For one, it saves battery. Plus, it stops nosy people from peeking into your phone when you leave it. Still, there are times when Auto-Lock becomes more of a problem. For instance, the phone keeps dimming during screen mirroring or its screen turns off while you’re reading an article or ebook.
So, this guide shows you exactly how to turn off Auto-Lock on iPhone. If the Never option in Auto-Lock is missing or the Auto-Lock button itself completely greyed out, don’t worry, we’ll show you how to fix it. So, you can adjust how long the iPhone display stays on based on your preference.
How to Turn Off Auto-Lock on iPhone
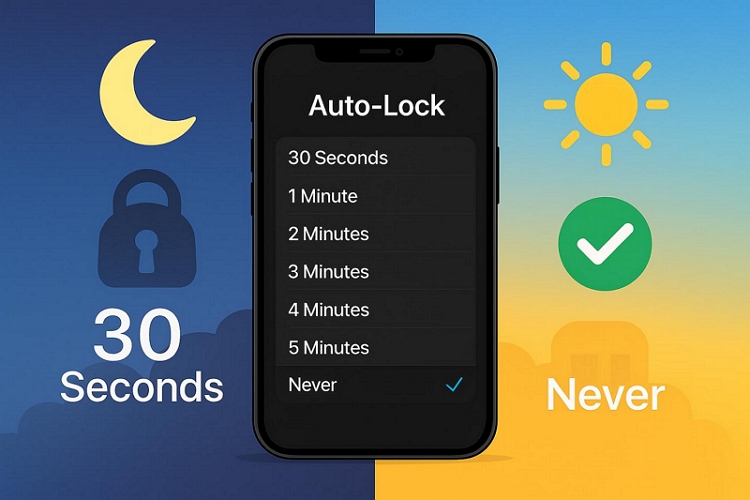
The iPhone lets you pick from a few preset durations. You’ll find options ranging from 30 seconds all the way to 5 minutes. And there’s also a Never option which will disable Auto-Lock entirely. That means your iPhone screen won’t dim, sleep, or turn off unless you manually press the side button.
To tweak this:
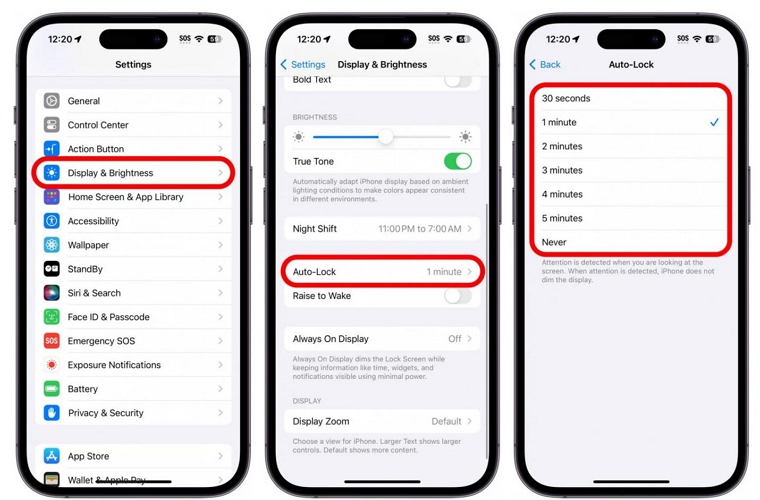
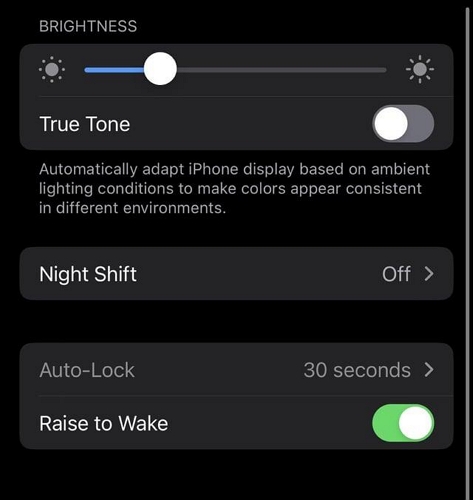
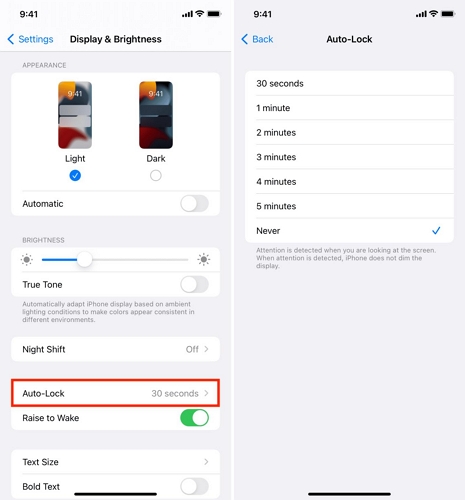
Step 1. Choose Display & Brightness from your Settings menu.
Step 2. Look for Auto-Lock. Tap into that.
Step 3. And now you will get to choose, like 3 or 5 minutes. To completely turn off Auto-lock, choose Never.
Why Can’t I Turn Off Auto Lock on My iPhone? [Fixed]
When the Auto-Lock settings show no “Never” option or the Auto-Lock option is completely greyed out, it means that iPhone settings are interfering with Auto-Lock controls. So, let’s look at what to do about it.
Case 1: Turn Off Auto-Lock Option “Never” Missing on iPhone
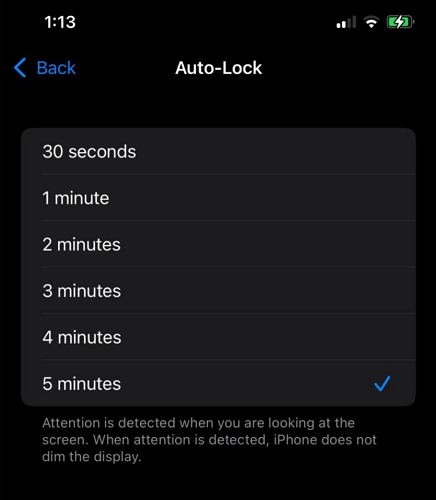
One common problem you’ll encounter is that you won’t see the “Never” option at all after tapping Auto-Lock. Instead, you’ll only see short durations like 30 seconds. This is caused by certain background features that are designed to save iPhone power.
How to Fix: Disable Low Power Mode
Yes, Low Power Mode forces the screen to dim and lock quickly to conserve battery. That’s why “Never” doesn’t show up. Here’s how to turn off Low Power Mode:
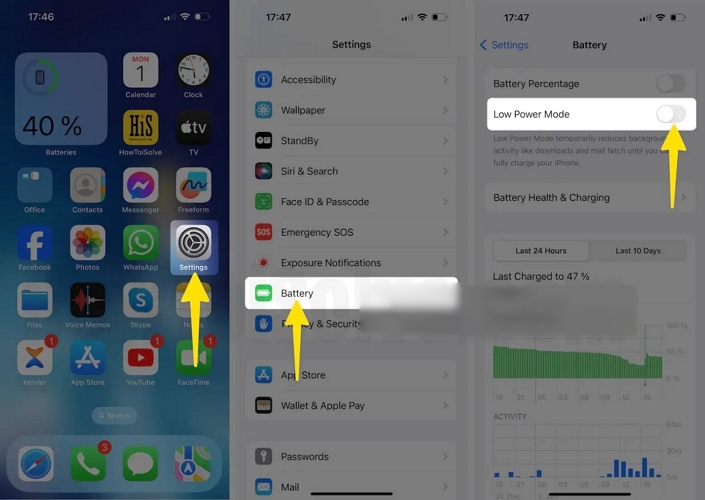
Step 1. Go to Settings and scroll down to tap Battery.
Step 2. At the very top, you’ll see Low Power Mode. If it’s enabled, the toggle will be green and the battery icon on your screen will be yellow.
Step 3. Just turn it off. Make sure the toggle turns gray.
After that, go back to the Auto-Lock settings and you’ll see the full list of timeout options again, including the “Never” one to stop the iPhone from dimming out on its own.
Case 2: iPhone Auto-Lock Greyed Out
The greyed-out Auto-Lock option means you can’t tap or change the timeouts at all. This happens because your iPhone has remote restrictions in place, which is common on devices issued by a school or company. These devices come with management controls that block certain settings, such as changing iPhone’s display time.
How to Fix: Remove MDM Profile from iPhone
These remote restrictions are part of something called an MDM profile—short for Mobile Device Management. And there are two ways to delete MDM from your iDevice. Let’s start with the first one.
Option 1: Remove MDM Manually (If You Have the Credentials)
If you have the MDM passcode, you can use the Remove Management button to get your iPhone out of MDM restrictions. Here’s how.
Step 1. Open Settings and tap General.
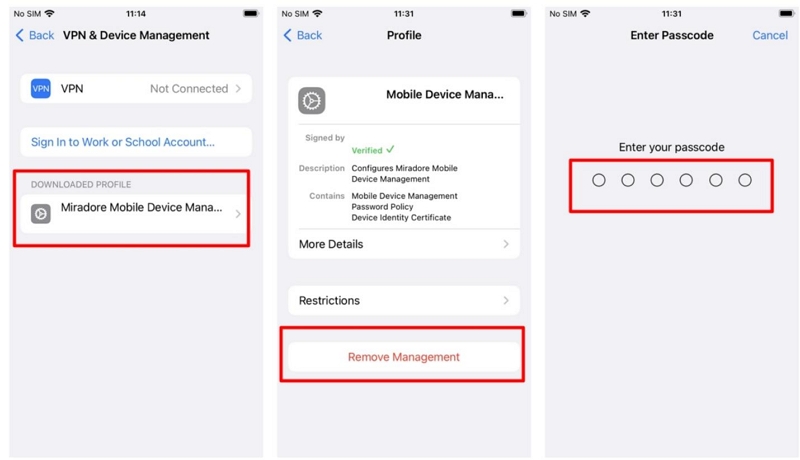
Step 2. From the General menu, choose VPN & Device Management.
Step 3. Look for a profile under Mobile Device Management, especially if it mentions your school or company. Tap it.
Step 4. At the bottom, tap Remove Management.
Step 5. Enter the passcode that is set by whoever installed the profile.
Once removed, you’ll now be able to change the Auto-Lock setting again.
Option 2: Remove MDM Without Passcode (Using Passixer iPhone Unlocker)
If you don’t have the MDM password, you can still remove MDM using Passixer iPhone Unlocker.
Passixer allows you to delete any MDM profiles such as Jamf MDM and Lightspeed MDM from your own iPhone without asking for credentials. That means you don’t need to contact the school or employer. After MDM removal, you will get full access to all your iPhone settings again, including Auto-Lock. Passixer will also keep the data on the unlocked iPhone safe while removing the remote restrictions.
Key Features:
- Provide 2 modes for MDM removal, whether your iPhone is accessible or stuck on the MDM screen.
- Remove Screen Time passcode instantly without wiping data.
- Delete locked Apple ID so you can sign in with your iPhone with new Apple account.
- Remove forgotten screen passcode from iPhone or iPad.
- Bypass iCloud Activation Lock, enabling you to open your iPhone again.
How to Use Passixer to Remove MDM Without Admin or Password
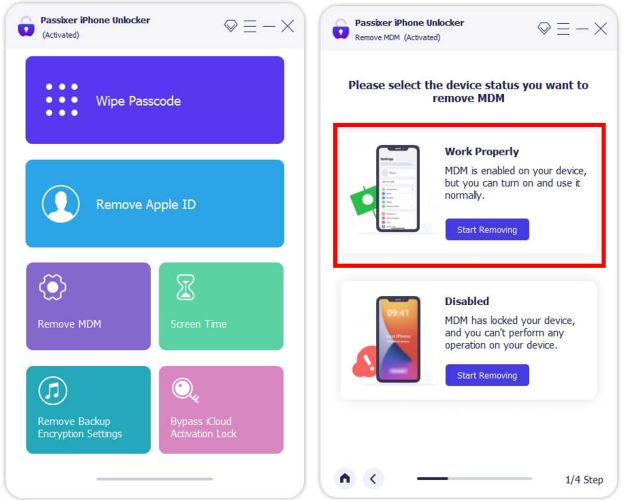
Step 1. Launch Passixer iPhone Unlocker on your Mac or Windows computer.
- From the main screen, select Remove MDM and locate Work Properly mode.
- Click Start Removing to continue.
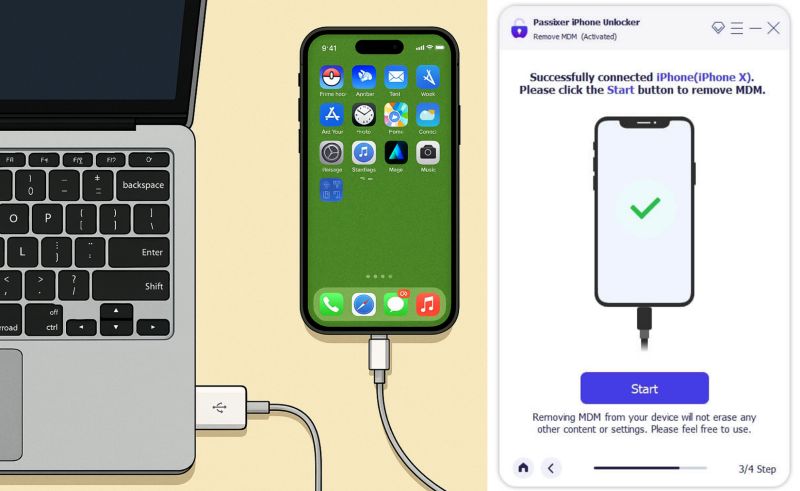
Step 2. Connect your iPhone to the computer using a USB cable.
- If Find My iPhone is off, click Start. The MDM profile will disappear in seconds and you’ll immediately regain access to the Auto-Lock settings.
- If Find My iPhone is on, you’ll first be asked to turn it off. Follow the onscreen guidance and toggle off the switch.

Step 3. Once the device reboots, go to the Auto-Lock menu. And the Auto-Lock option will no longer be grayed out. You’ll see the full list of durations again, including the “Never” option.
Wrap Up
iOS gives you full control when it comes to Auto-Lock. And now, you know how to turn off Auto-Lock on iPhone through Settings. If the option is missing or greyed out, we’ve already shown you why and how to bring it back.
Passixer iPhone Unlocker helps when your iPhone is remotely managed and the Auto-Lock setting is completely locked. It works even if you’ve forgotten the MDM passcode or the MDM profile is fully restricted. The best part? None of your data is erased during the process if you can open your iPhone.
And beyond MDM removal, Passixer can also remove Screen Time passcode, Apple ID, or any other restrictions from your iOS device.