
Learning how to switch SIM cards on iPhones is essential for anyone upgrading devices, changing carriers, or managing multiple iPhones. SIM cards control your iPhone’s network connection, enabling calls, text messages, and mobile data.
Many users wonder: “Can I just switch SIM cards in iPhones?” or “What happens if I switch SIM cards?” The answers depend on factors like carrier locks, network compatibility, and iPhone model.
This guide will cover everything you need to know in 2025, including:
- Switching SIM cards between iPhones safely
- Data transfer considerations when moving your SIM
- Carrier and SIM lock issues and how to resolve them
- Setting up a new iPhone without removing your SIM card
By following this guide, you’ll ensure a smooth transition and avoid common pitfalls when switching SIM cards on your iPhone.
Part 1: Can You Switch SIM Cards Between iPhones?
Yes, you can switch SIM cards on iPhones in most cases, as long as the SIM type matches your device and the iPhone is unlocked for your carrier. This guide will explain everything you need to know about compatibility, precautions, and potential network restrictions.
Check SIM Compatibility
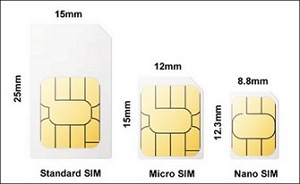
Before switching SIM cards, it’s important to check your iPhone’s SIM type:
- Modern iPhones (iPhone XS and later): Use nano-SIMs and support eSIMs.
- Older models: May have micro-SIM or regular SIM sizes.
Always ensure you use the correct SIM size to avoid issues when switching SIM cards.
Things to Consider Before Switching SIM Cards
Physical SIM vs. eSIM
- Form Factor: Physical SIM is a removable chip, while eSIM is a built-in digital SIM.
- Installation: Physical SIM goes into the SIM tray manually; eSIM is activated via QR code, carrier app, or iPhone Settings.
- Switching Carriers: Physical SIMs need to be physically swapped, whereas eSIM profiles can be changed instantly in Settings.
- Security: Physical SIM can be removed if the phone is stolen; eSIM is more secure as it cannot be removed without device access.
- Travel Convenience: Physical SIM requires local purchase; eSIM allows remote activation of international plans.
Carrier-Locked iPhones
You can switch SIM cards on unlocked iPhones easily. If your iPhone is carrier-locked, you must unlock it first; otherwise, SIMs from other carriers won’t work.
Regional Network Restrictions
Some carriers restrict network access by region. For instance, an AT&T-locked iPhone in the U.S. won’t work with an Indian Jio or Airtel SIM. Check regional compatibility before switching SIM cards on your iPhone, especially if traveling internationally.
Part 2: How to Switch SIM Cards on iPhone (unlocked)
Switching SIM cards on an unlocked iPhone is straightforward. Follow these step-by-step instructions to make the process quick and easy.
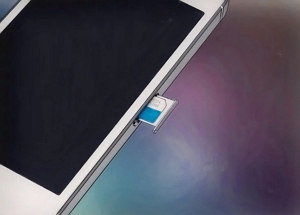
Step 1: Insert the SIM card ejector tool into the small hole on the side of your iPhone. Press gently to release the SIM card tray.
Step 2: Carefully pull out the SIM tray and remove your old SIM card.
Step 3: Place the new SIM card into the tray correctly and slide it back into the iPhone.

It’s recommended (but not required) to turn off your iPhone before switching SIM cards. This helps avoid any SIM card reading issues. Once the new SIM is in place, you can power on your device.
Part 3: How to Transfer a SIM Card from iPhone to iPhone
Can you transfer a SIM card from one iPhone to another? The answer is yes, as long as your SIM is unlocked. This guide covers both physical SIM cards and eSIMs, including iPhones without a SIM tray.
Section A: Transferring a Physical SIM Card (iPhones with SIM trays)
Required Tools: SIM ejector tool (or paper clip as an alternative)
Step 1: Remove the SIM Card from Your Old iPhone
- Locate the SIM tray (left or right side depending on model).
- Insert the SIM ejector tool and push gently; the tray will slide out.
- Take out the SIM card carefully.

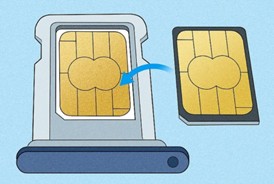
Step 2: Insert the SIM Card into Your New iPhone
- Open the SIM tray on the new iPhone.
- Place the SIM card in the tray with the correct orientation.
- Push the tray back until it clicks.
Step 3: Activate the SIM
- Turn on the iPhone; it should detect the SIM automatically.
- If prompted, follow on-screen instructions for carrier activation.
Step 4: Troubleshooting (if needed)
- SIM not detected? Check tray alignment, clean debris, or restart iPhone.
- Do not force the tray; use the correct tool to avoid damage.
Section B: Switching SIM on iPhones Without a Physical SIM (eSIM)
All iPhones from iPhone 14 onward use eSIM only. Here’s how to transfer or add eSIM.
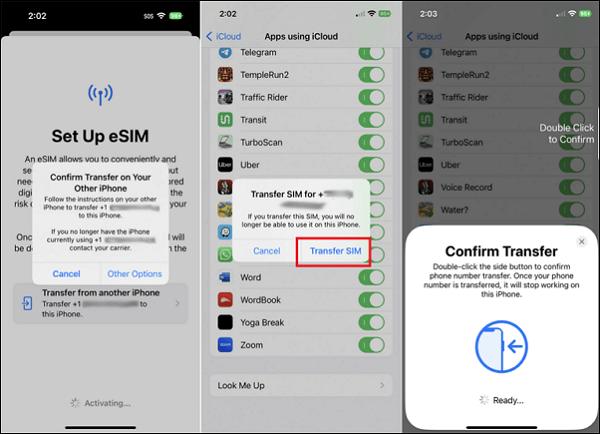
Scenario 1: Transfer eSIM During Initial Setup (Quick Start)
- Place both iPhones next to each other.
- On the new iPhone, follow the on-screen setup prompts and tap “Set Up eSIM → Transfer from Another Phone.”
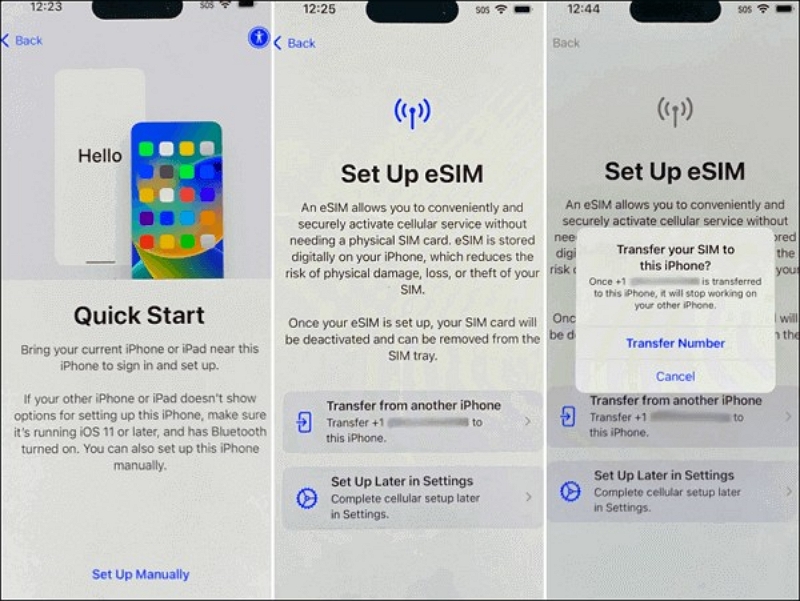
- On the old iPhone, tap “Transfer SIM” and enter the verification code if prompted.
- Confirm the transfer and finish setup.
Scenario 2: Add eSIM After Setup
Before starting, ensure your iPhone is unlocked and supports eSIM activation.
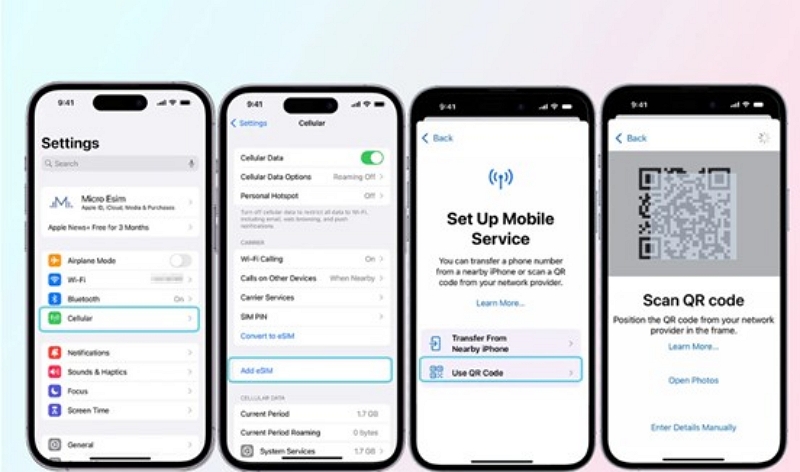
Method 1: Using a QR Code
Step 1: Go to Settings > Cellular > Add eSIM / Add Cellular Plan.
Step 2: Select “Use QR Code” and scan the code.
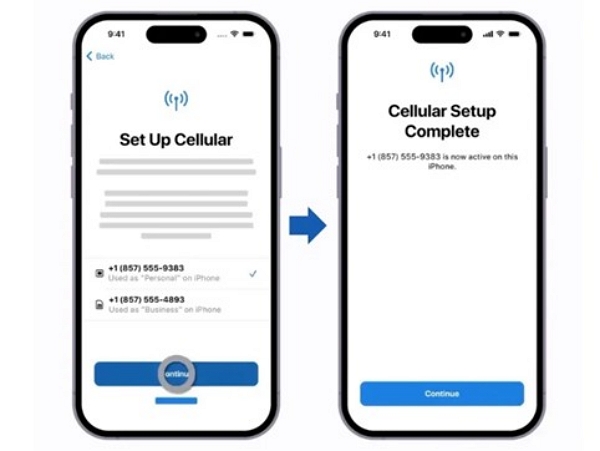
Step 3: Follow prompts to activate and label the line.
Step 4: Choose which line to use for voice, data, and messages.
Method 2: Using Carrier App
Step 1: Install your carrier’s app and log in.
Step 2: Navigate to eSIM activation and follow instructions.
Step 3: Confirm in Settings > Cellular.
Method 3: Quick Transfer from Another iPhone
Step 1: Keep the old, unlocked iPhone nearby and on Wi-Fi.
Step 2: On the new iPhone: Settings > Cellular > Add eSIM > Transfer from Nearby iPhone.
Step 3: Confirm transfer on both devices.
Scenario 3: Convert Physical SIM to eSIM on the Same iPhone
Requirements: iPhone XS / XR or newer, iOS 16+, carrier supports eSIM conversion.
Step-by-Step Process
Step 1: Settings > Cellular → tap the line to convert.
Step 2: Tap “Convert to eSIM” and follow prompts.
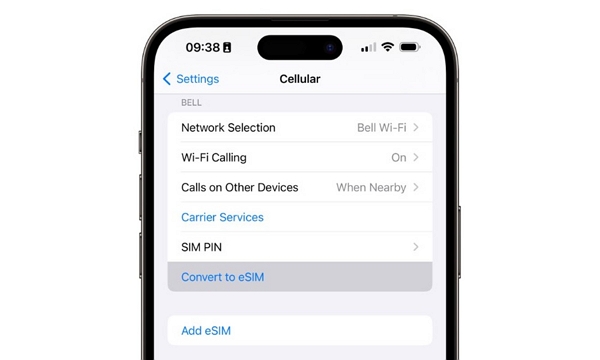
Step 3: Wait for activation; the physical SIM will deactivate.
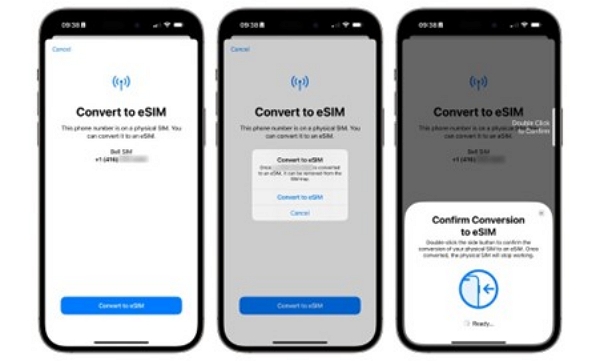
Step 4: Remove the physical SIM and restart iPhone.
Extra tips to avoid issues:
- Ensure Wi-Fi and Bluetooth are enabled.
- eSIM transfer may take up to 45 minutes.
Part 4: What Happens When You Switch SIM Cards in iPhones
Part 5: Switching SIM Cards on a Locked iPhone
If your iPhone is SIM-locked or carrier-locked, you cannot simply insert a SIM card from another provider. A SIM lock ties your iPhone’s firmware to a specific network, preventing it from working with unauthorized SIM cards, while a carrier lock restricts your device to the original mobile provider, often due to contract obligations or installment plans. When you try to use a SIM from a different carrier on a locked iPhone, you may see an “Invalid SIM” or “SIM Not Supported” message, meaning switching SIM cards without unlocking the phone is impossible.
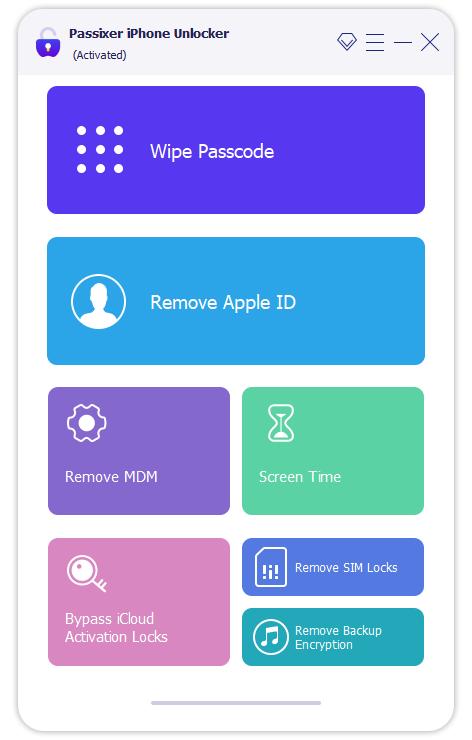
Fortunately, there’s a reliable solution: Passixer iPhone Unlocker. This powerful tool safely removes both SIM and carrier locks, allowing you to freely switch between any network provider without risking your device.
Launch Passixer iPhone Unlocker on your computer and select the “Remove SIM Lock” option.
Use a USB cable to connect your iPhone to the PC. Make sure the connection is stable.
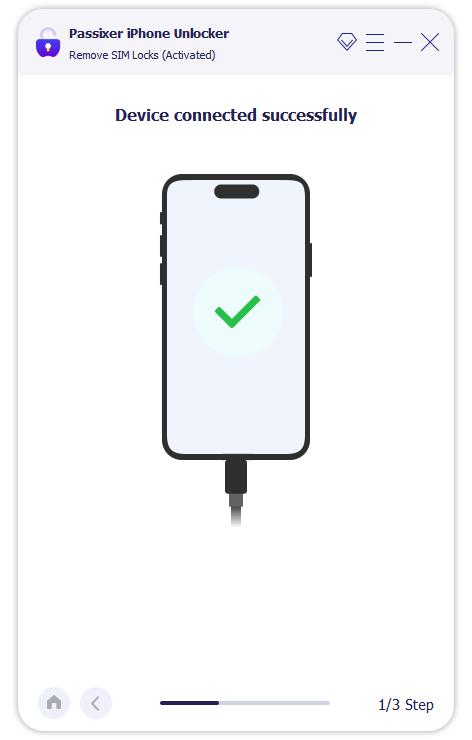
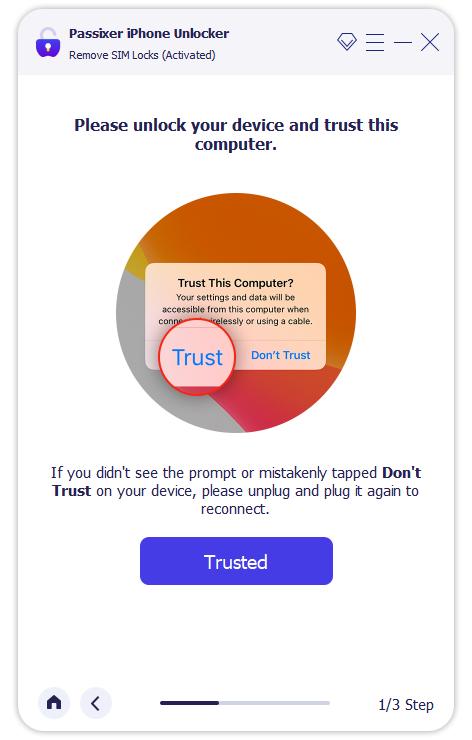
Since your iPhone does not recognize the PC, tap “Trust” on your device to allow detection and configuration.
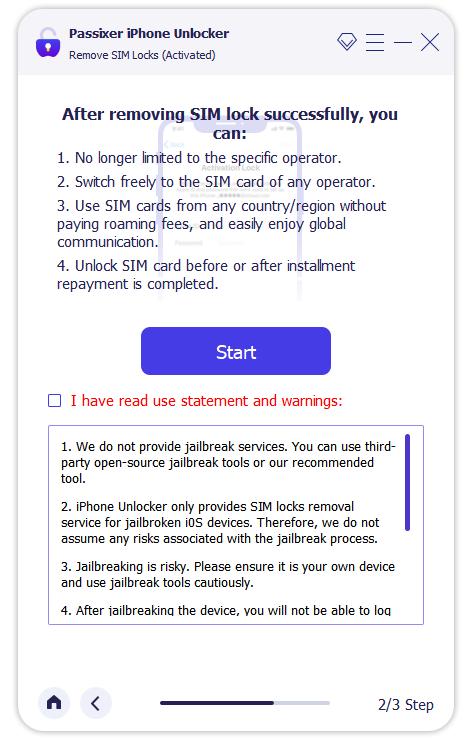
Jailbreaking is necessary for SIM lock removal. Click “Start,” select “iOS Jailbreak,” and follow the on-screen instructions to complete the process.
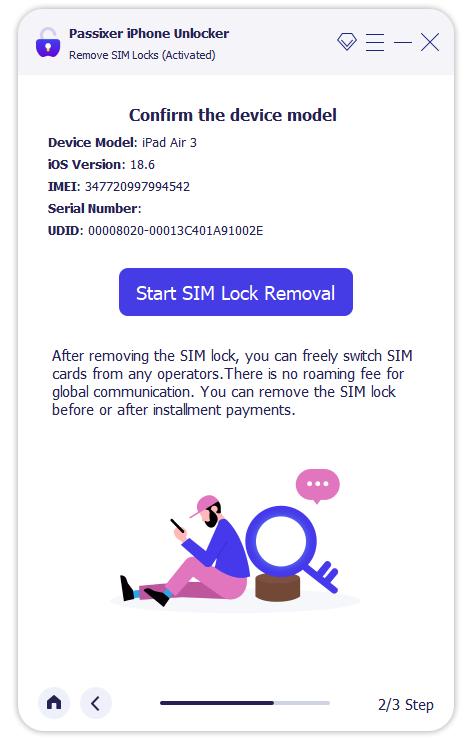
After jailbreaking, Passixer detects your iPhone and displays its details. Confirm the information and click “Start SIM Lock Removal.”
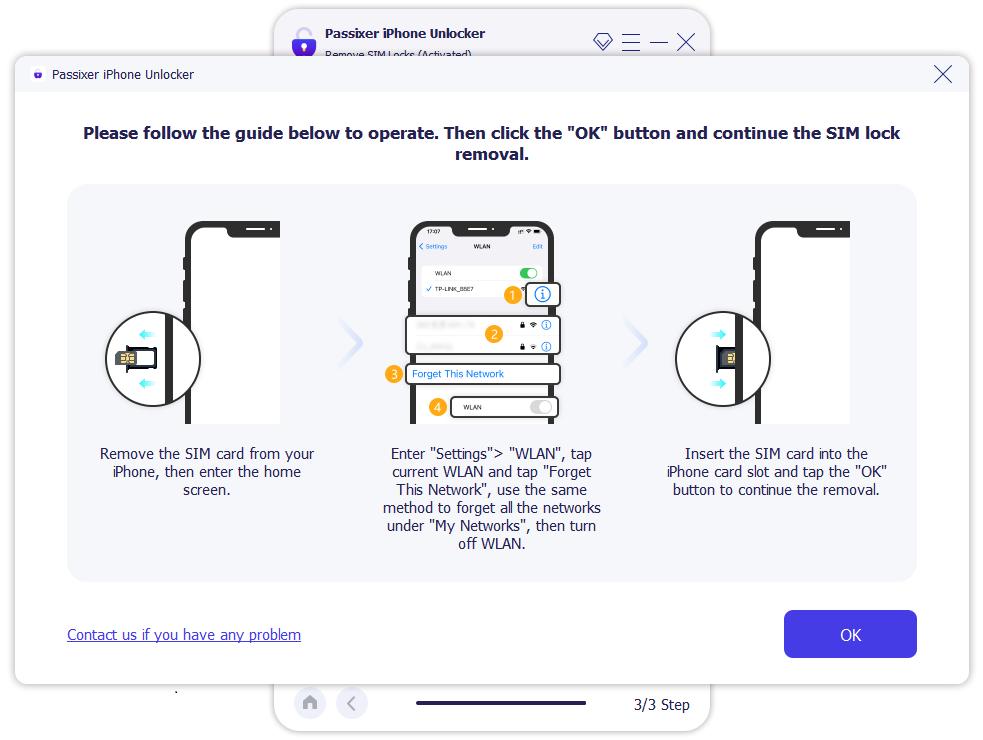
Follow the instructions to remove all Wi-Fi and network connections. Make sure Wi-Fi is turned off.
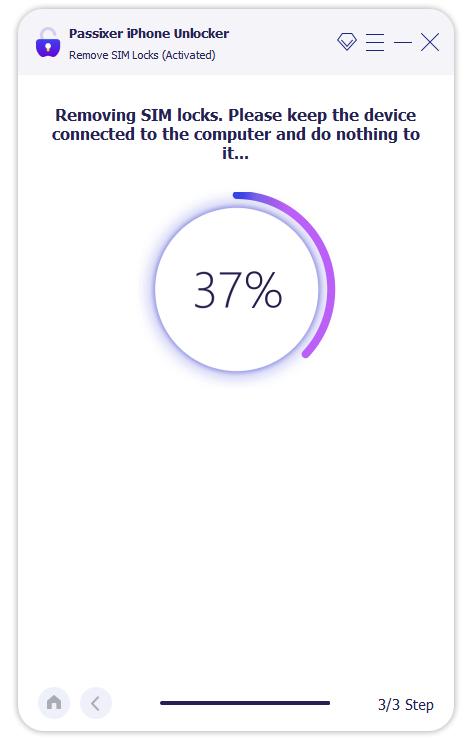
The SIM lock removal process will begin automatically. Please wait patiently until it finishes.
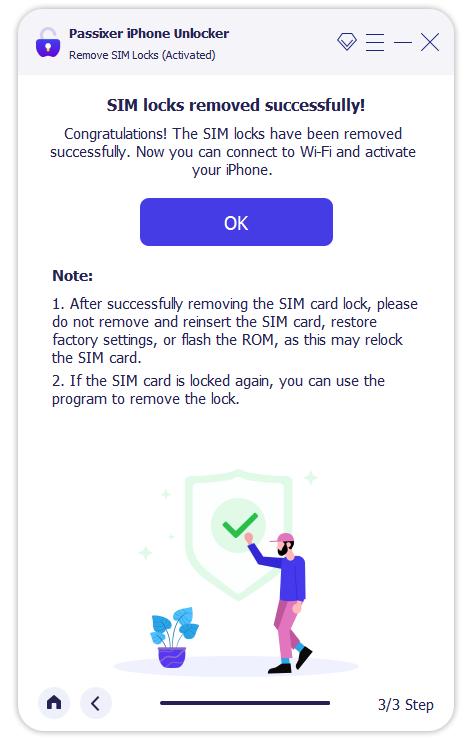
Once you see the message “SIM Locks Removed Successfully,” click “OK” to finish the process.
Part 6: Switching iPhones Without Removing SIM Card
Yes, you can switch iPhones without removing the SIM card. This is useful in several scenarios:
1. Setting up a new iPhone before carrier activation:
- Switch on the new iPhone.
- Choose the language, region, and Wi-Fi network.
- Skip the cellular setup when it prompts you.
- Complete the setup using Quick Start or iCloud Restore.
- Activate the carrier later via eSIM setup or SIM insertion.
2. Upgrading to eSIM but keeping the old SIM in the current iPhone:
- Test eSIM activation on the new iPhone while keeping the old SIM active.
- This maintains fallback access and dual lines.
- Once the eSIM is activated, the physical SIM is automatically deactivated.
3. Gifting the old iPhone to someone else:
- Back up your data to iCloud or your PC.
- Sign out of iCloud.
- Turn off Find My iPhone.
- Erase all content: Settings > General > Transfer or Reset iPhone > Erase All Content and Settings.
4. Transfer methods without SIM swap:
Quick Start with eSIM Transfer
- Place the new iPhone next to the old one.
- Power on the new iPhone and follow on-screen prompts.
- Choose Transfer eSIM when prompted.
- Complete setup and confirm cellular activation.
iCloud Backup and Restore – Data only
- Back up your old iPhone to iCloud.
- Set up the new iPhone and choose “Restore from iCloud Backup.”
- After setup, activate eSIM manually via the carrier app or QR code.
Encrypted iTunes/Finder Backup (Mac/PC)
- Connect your old iPhone to your PC.
- Create an encrypted backup via iTunes or Finder.
- Restore the backup to the new iPhone.
- Activate the eSIM separately.
FAQs
Conclusion
If you are not satisfied with your network carrier’s services or plan to travel abroad without coverage, consider switching SIM cards on your iPhone. This comprehensive guide discusses everything you need to know about SIM swapping on iPhones. It should clear all your doubts about swapping SIM cards on your iPhone or setting up an eSIM on your device. We have also discussed a unique tool that helps you unlock your SIM and carrier locks regardless of your location.